
Have you ever wondered how your audience feels about a particular issue? Understanding their feelings and opinions can help you develop better content, create better offers, draw traffic to your site, and sell more products and services. But how do you get that information?.
The easiest way to find out your audience’s thoughts is by asking them directly with a poll. You can query them about anything you like. In this tutorial, you will learn how to create an audience poll using Gravity Forms and a live report of the results using GFChart.
Before you get started, be sure to install Gravity Forms and GFChart. You’ll be using Gravity Forms’ polls add-on, which requires the Elite License. (Honestly, the Elite is packed with so many great features that it’s worth the expense.)
If you’ve never installed a WordPress plugin before, check out this guide.
Understanding their feelings and opinions can help you develop better content, create better offers, draw traffic to your site, and sell more products and services
How to Create an Audience Poll
First, you’ll create the form for your audience to submit their responses. Let’s walk through the steps.
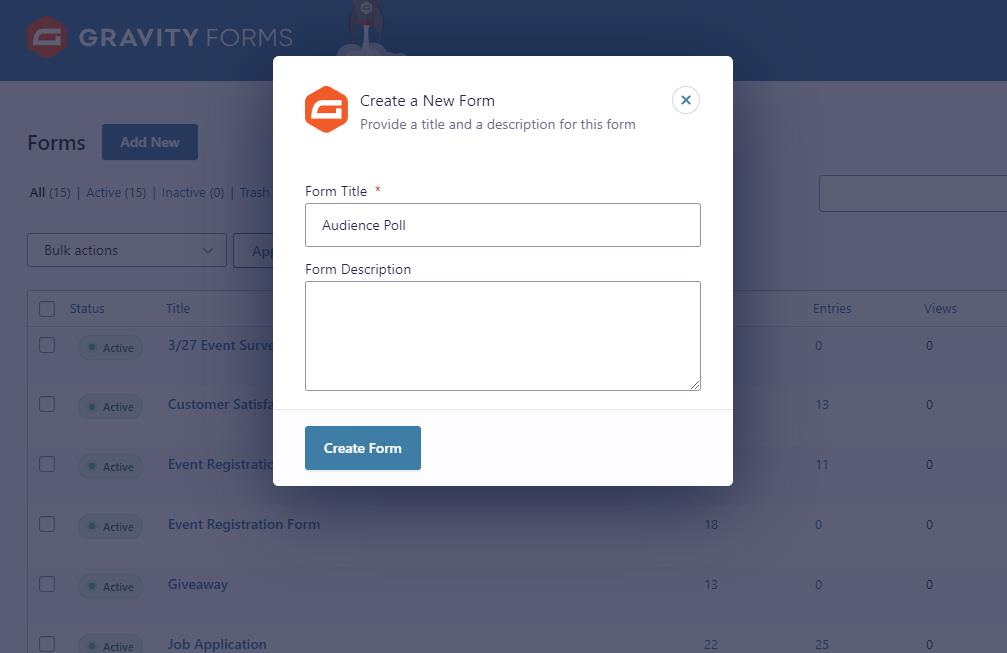
Step 1. Create a New Form
In your WordPress back end, click Forms > New Form. A popup overlay will appear where you’ll need to give the form a name. Use something unique so you can tell this form apart from other forms. Then click Create Form.
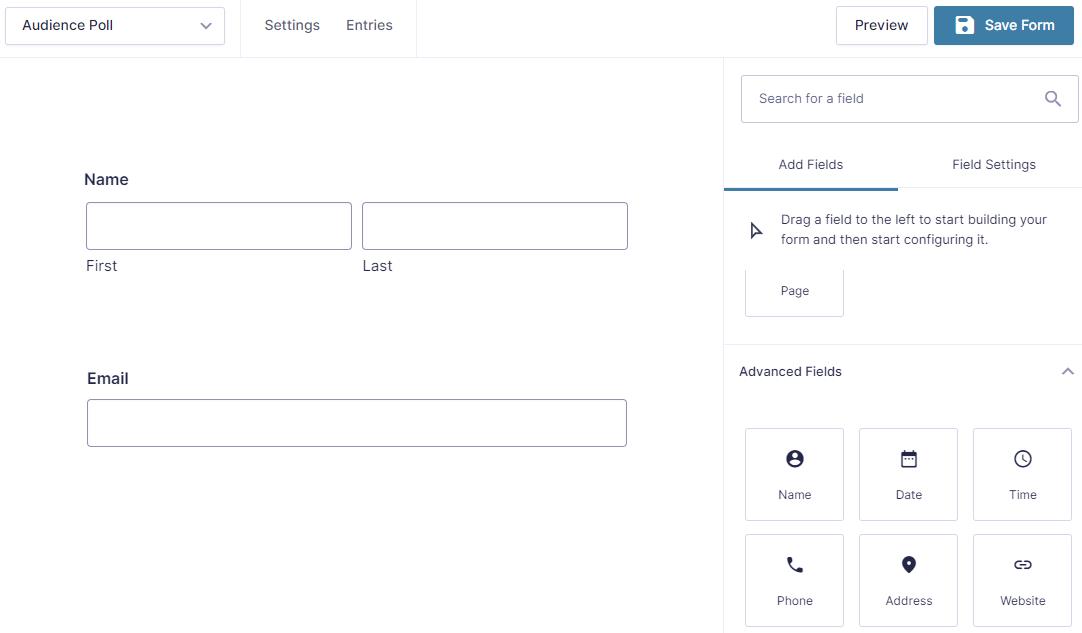
Step 2: Add Basic Fields to Your Form
Before you start designing your poll question(s), it’s wise to include some basic fields to capture information about the submitter. You’ll definitely want to ask for their name and email address (so you can add them to your email marketing list), but you may ask for other information depending on your needs.
Add fields by clicking on them in the right column. They will appear in the form editor in the left column. Alternatively, you can drag them from right to left.
Step 3. Add the Poll Field to Your Form
Next you’ll add the poll field. You can add as many poll questions as you like. You’ll find the poll field in the bank of fields in the right column in the Advanced Fields section. Click the poll field to add it to your form.
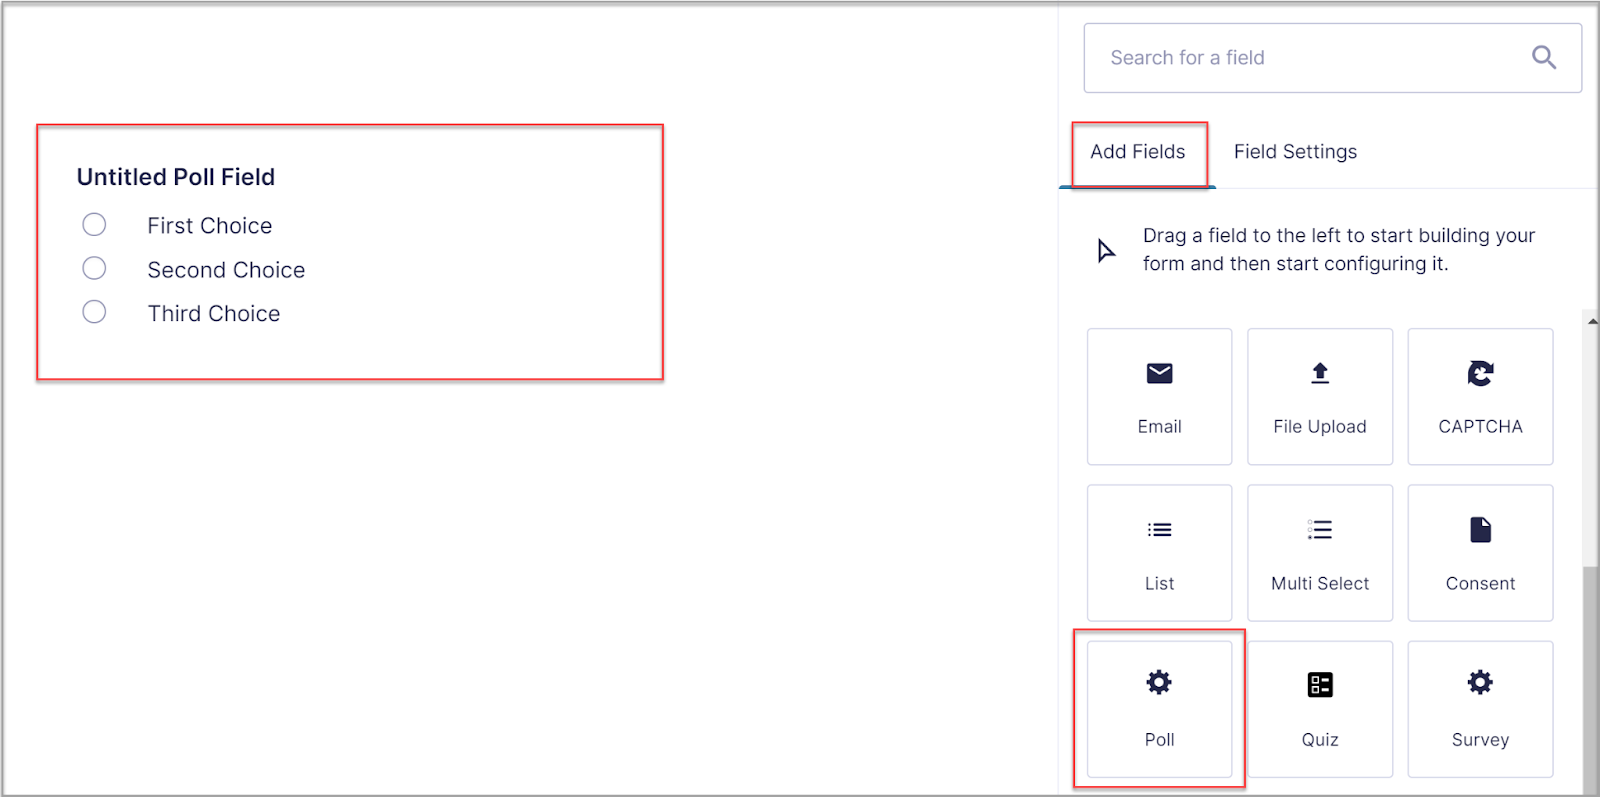
Select the poll field in your form editor to configure its settings. Insert the poll’s question in the Field Label space. Then insert the potential answers down below. If you think the submitter needs more guidance about answering that question, add some text to the Description space.
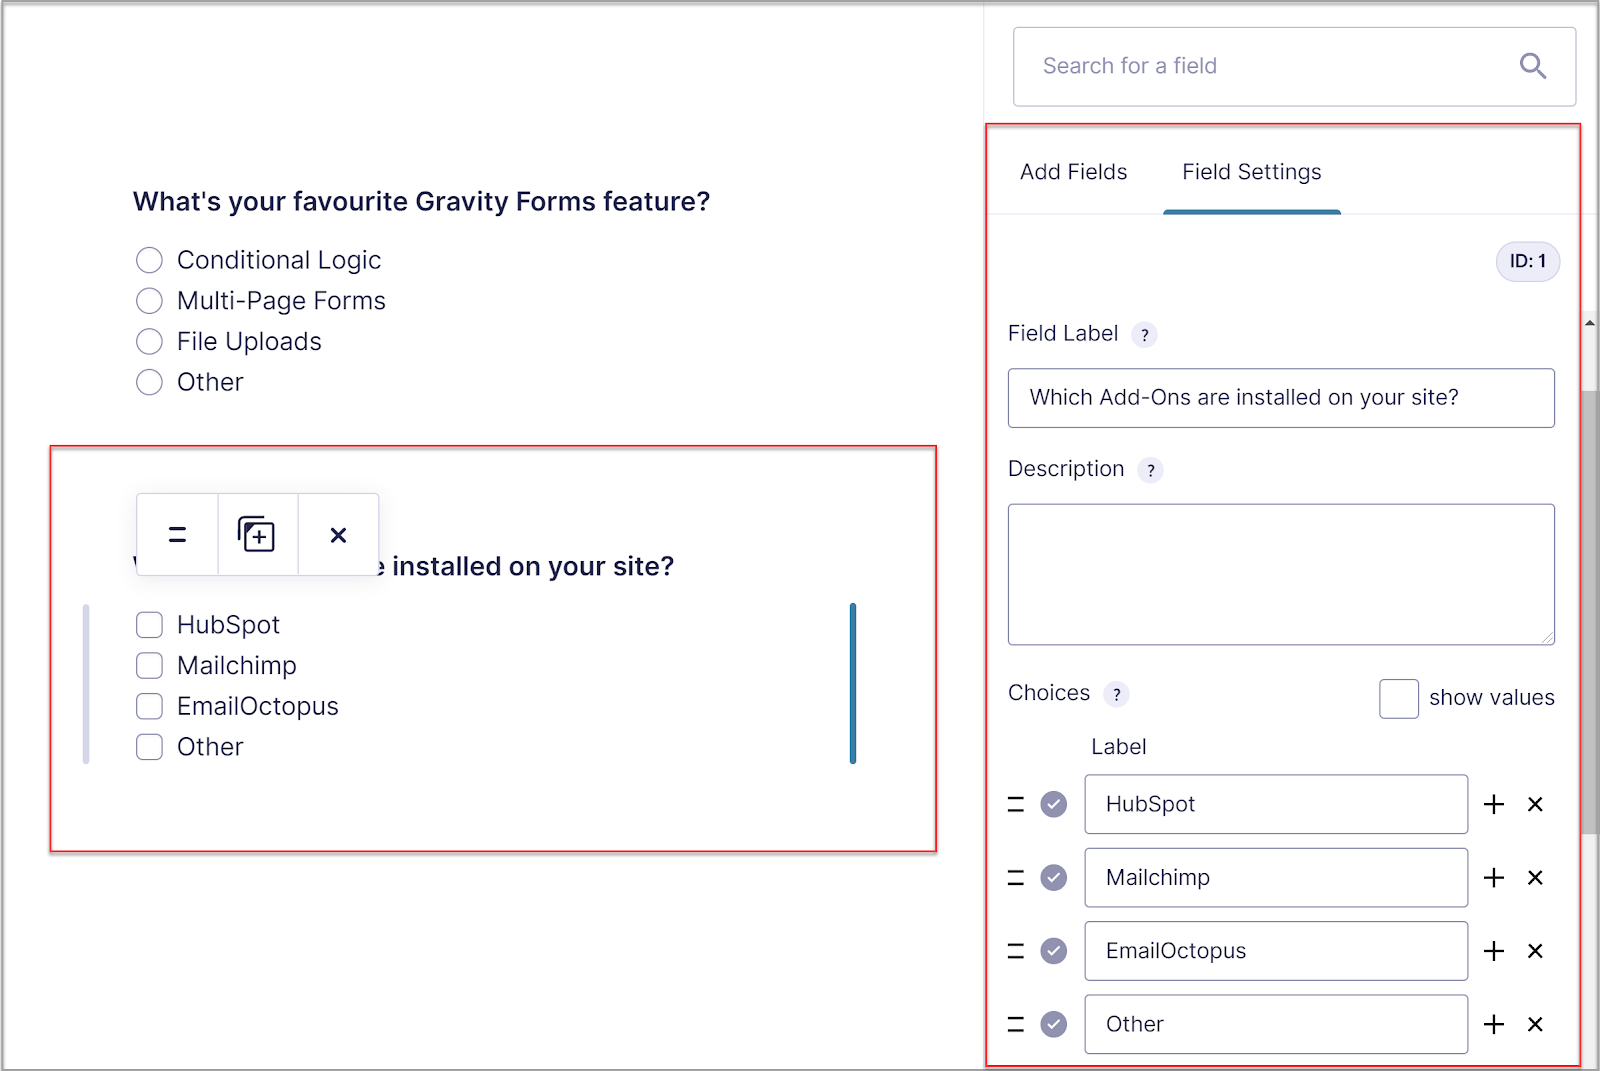
You have some more options here, as well. You can customize where the labels appear, add some custom CSS to make your form unique, or add a custom validation message.
Furthermore, you can use conditional logic to send people to different questions based on their answers. Using conditional logic requires that you have at least two questions in your poll.
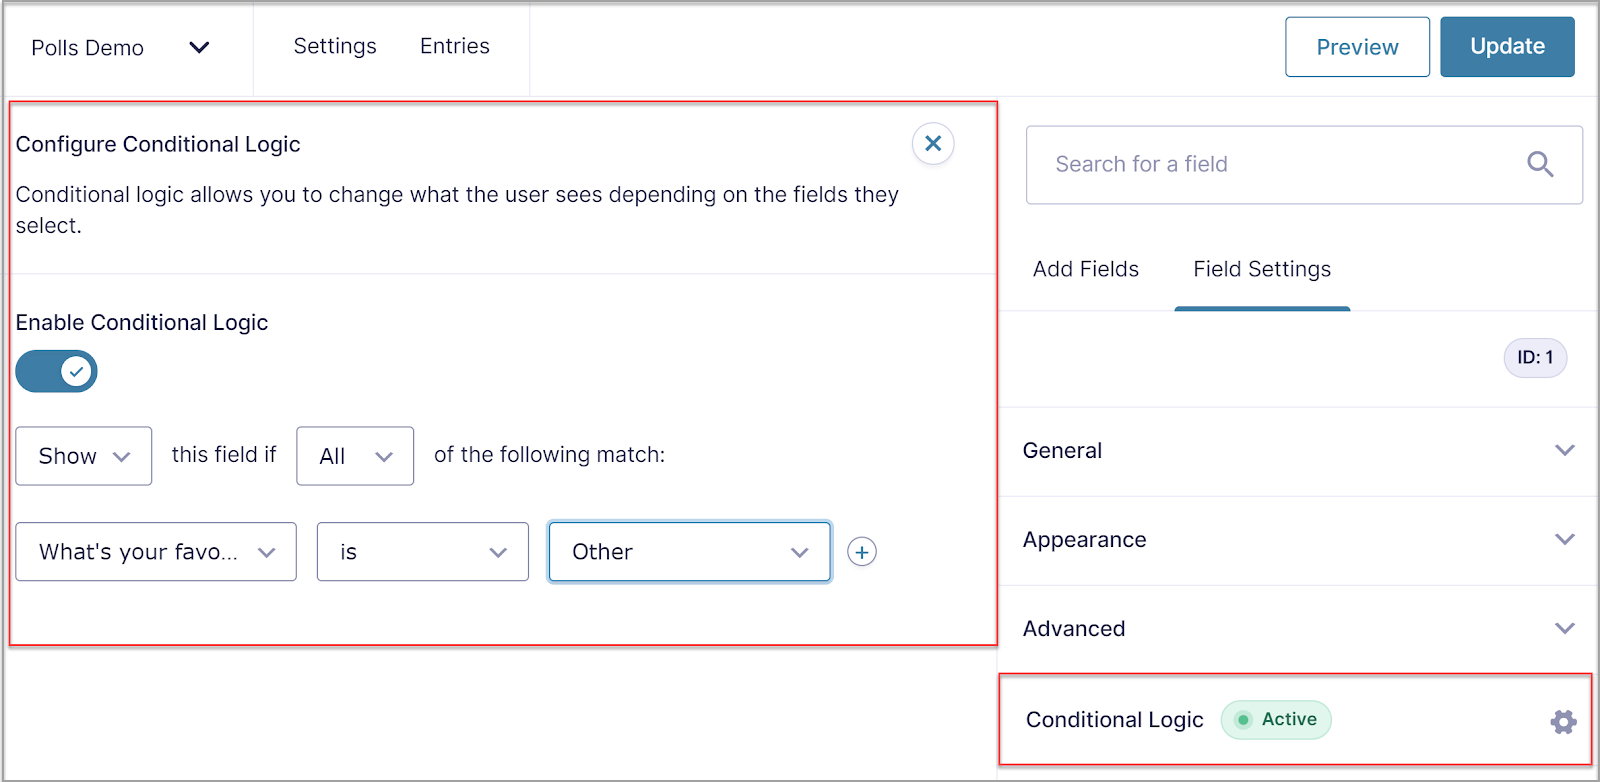
If you want more poll questions in your form, simply drag more poll fields into the editor and customize them for your needs. When done, click Update at the top right of the page to save the form. Click Preview to make sure it works properly.
Step 4. Set Up Confirmations Notifications
Confirmations are messages the submitter sees upon submitting a form. Gravity Form’s default confirmation (“Thanks for contacting us! We will get in touch with you shortly.”) is probably fine, but you might want something unique.
Visit Settings > Confirmations and click Edit under the default confirmation. You can edit the text, select a page on your WordPress site to redirect the user, or add a URL of a redirect page.
Notifications are emails to let the submitter or other parties know that someone submitted a form. For instance, you might want someone on the marketing team to know whenever a user completes the audience poll.
Visit Settings > Notifications. Click Add New to create a new notification and complete each field. To add form data, you can use merge tags (the button to the right of the field). We recommend using the “All Submitted Fields” merge tag to display all submission data.
Step 5. Add the New Form to a Page
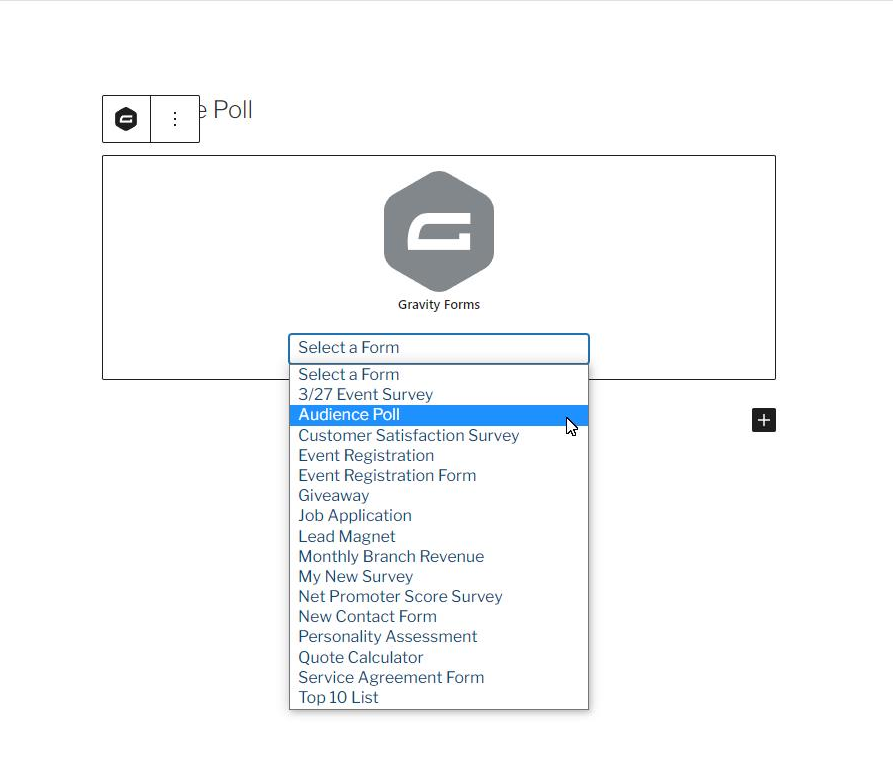
Once your poll is complete, the next step is to add it to a page so your audience can access it. Open a new or existing page in your WordPress backend and add the Gravity Forms Gutenberg block. Select the audience poll you just created to embed the form.
Configure the block in the right-side settings any way you like. Then click Publish or Update when you’re finished.
Step 6: View the Poll Results
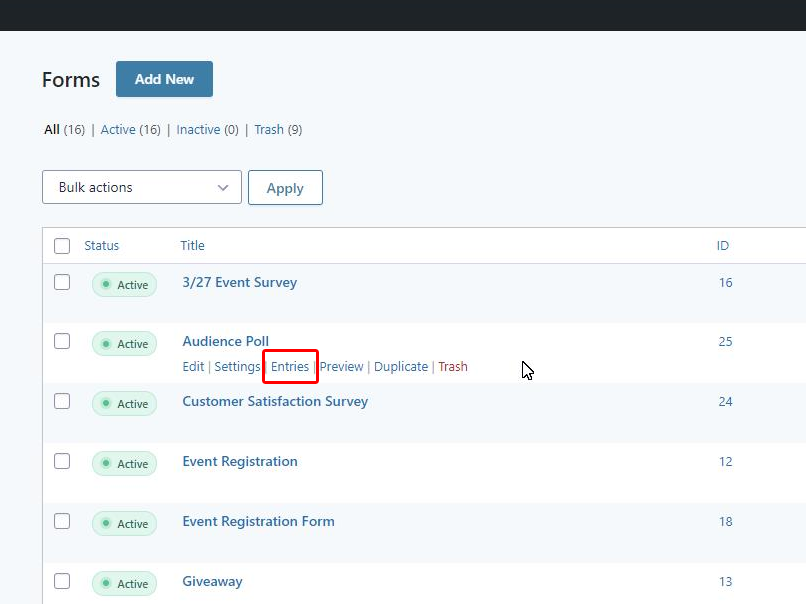
As your audience submits answers to the poll, you’ll want to review the results. You can view them in your WordPress dashboard by clicking on Forms, finding your poll in the list of forms, and clicking the Entries button below it.
On the next page, click the Poll Results tab at the top, and you’ll see all the questions as well as the answers your visitors selected. You can filter the results based on dates to see how the answers change over time. You can also sort by question if you want to see answers to a specific question.
How to Create a Live Report of Your Audience Poll
Now that your poll is complete and accessible to your audience, your next step is to display the poll results on the front end of your website. There are three ways to do this:
Option 1: Enable Option to Show Results on the Form
If you want users to see the results of the poll immediately after submitting their response, open the poll settings and check the following boxes:

Option 2: Create a Separate Page for Poll Results
Create a new page and insert the Poll block. Choose your poll from the drop-down menu to add it to the page. In the block’s settings, switch the Mode to “Results” and publish the page.
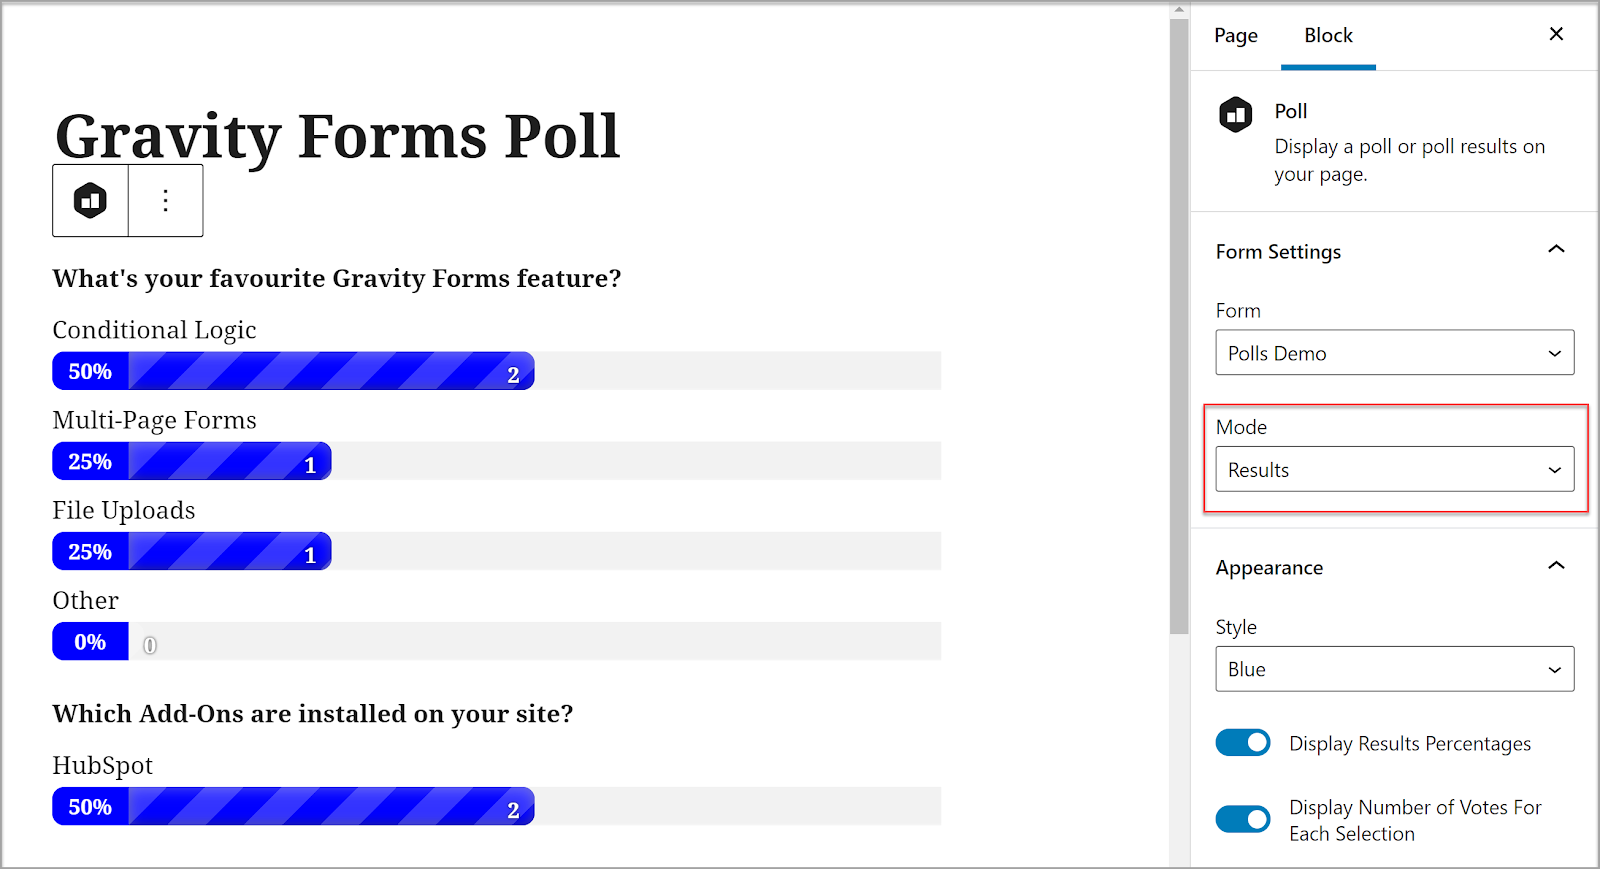
(For this to work, you’ll need to disable any settings you altered in Option #1 above.)
Option 3: Create a Visualization With GFChart
This is the most powerful way to display your results because it looks the best and gives you the most control. You can do this by using GFChart, a WordPress chart builder plugin. With GFChart, you can build an attractive visualization for each question of a form.
This solution works so well for two reasons: First, it’s available to anyone who visits the charts page, not just those who submit the form. Second, you can add multiple charts to the same page to give your audience a comprehensive view of your entire data set.
To make a chart, visit Forms > Charts/Calculations. Click Add New and give your chart a descriptive title. Then select the audience poll as the form source and click Create Chart/Calculation to start.
Inside the chart builder, you’ll see four tabs. Go through them one by one to customize your chart.
- Design: Choose the type of chart you’d like to create. In this case, a bar chart is probably most suitable. A few options will appear below. Choose whichever options make the most sense. Don’t worry, you can change these at any time.
- Select Data: On this tab, you must tell GFChart which field to use. Select one of your poll questions.
- Customiser: This is where you can adjust the look of your chart. You can alter the height and width to whatever works best with your website’s theme or add your own custom CSS.
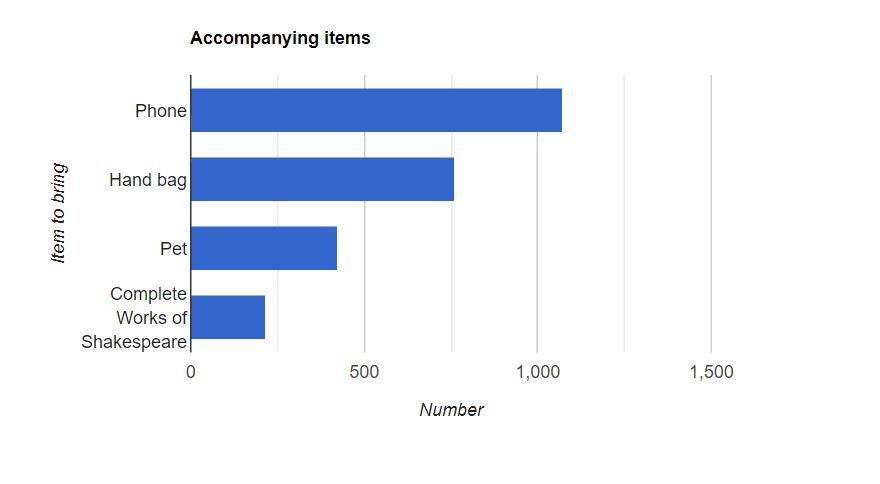
- Preview: Preview your chart before publishing it to ensure the data is displayed accurately. (Note: This will only display if you have some submissions for the chart to pull. You may need to make submissions to preview the chart, but you can always delete those entries afterward.)
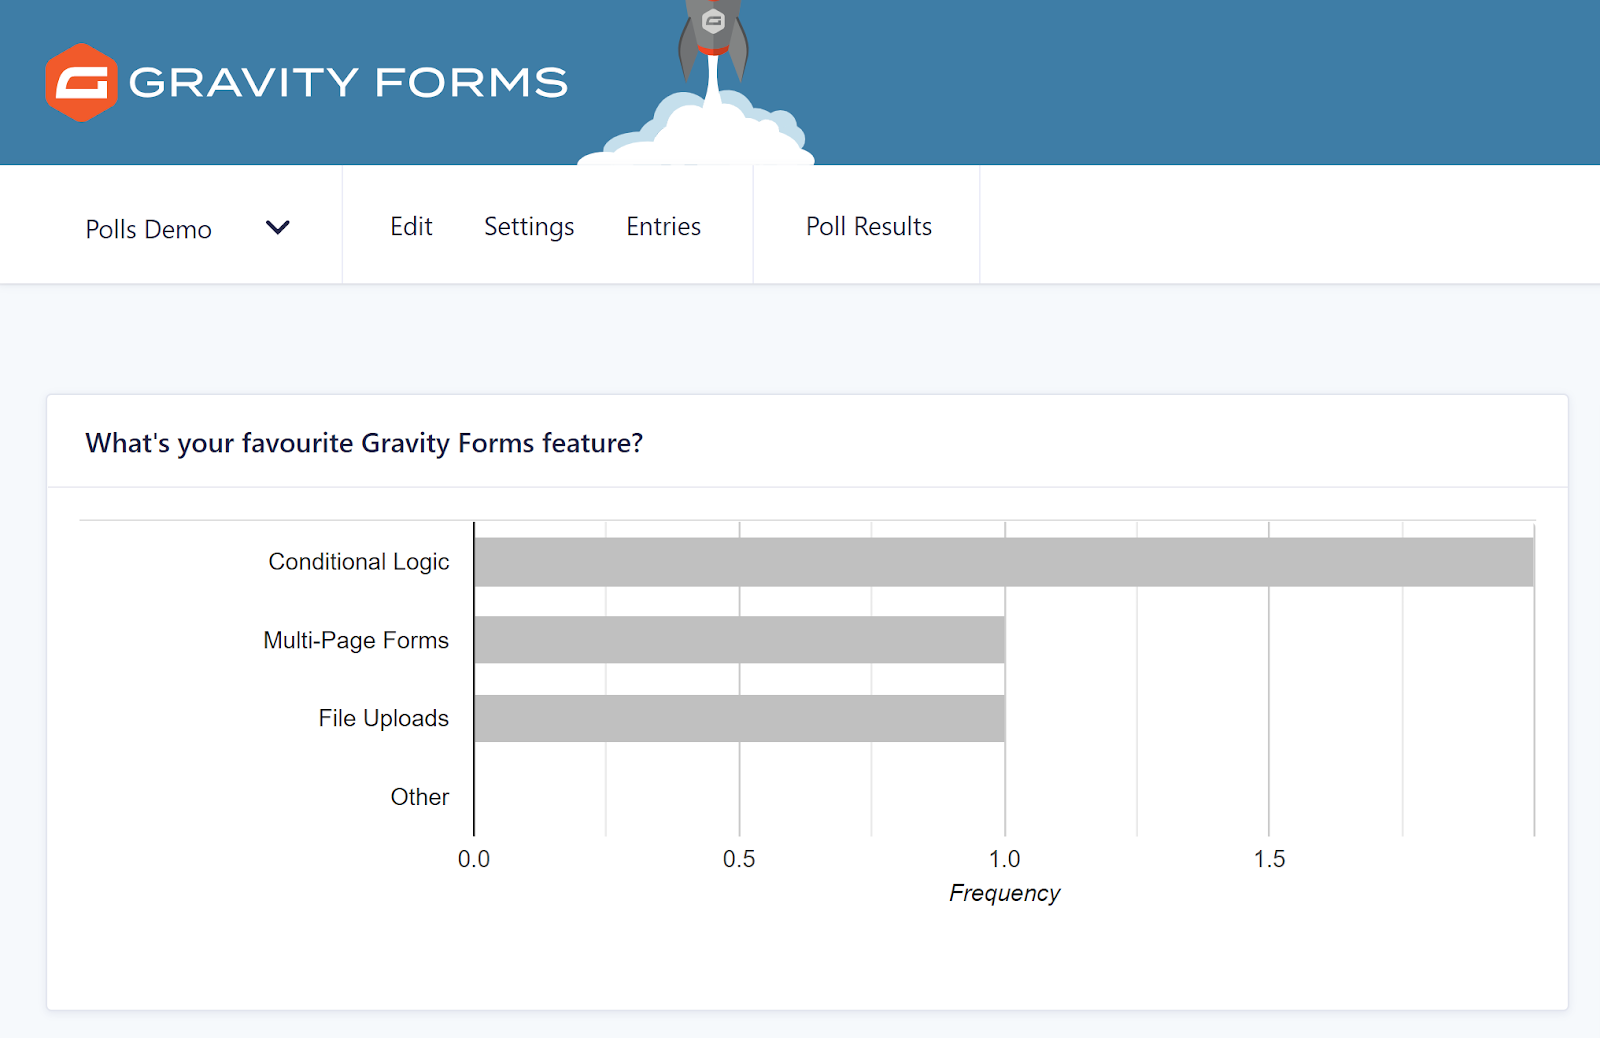
After completing those settings, the result will look something like this:
Once you’re happy with your chart, click Publish.
Lastly, add the chart to a page so your audience can view it. Visit the WordPress editor of the page or post where you want the form to appear. Insert the Chart block and select the chart you just created. The chart will update whenever the page is refreshed based on new submissions, so it will always be up to date.
Going Forward
Audience polls are powerful ways to learn more about your patrons so you can design content and offers that appeal to them. Use this tutorial to create a simple poll with live reporting so you always know what your audience thinks.