
Gravity Forms Calculations: How to Calculate Numbers Based on User Submissions
If you’re a Gravity Forms user on your WordPress site, you may want your form to perform calculations based on user submissions. This is possible with Gravity Forms calculations. You can perform calculations inside form fields, notifications, and confirmations.
This unique feature offers plenty of functionality. You could use it to sell discounted items, book tickets for events, calculate RSVPs, calculate taxes or VAT, or give sales quotes. Performing calculations based on Gravity Forms entries allows you to build a variety of powerful applications.
In this article, we’re going to show you how you can do Gravity Forms calculations.
Different Types of Gravity Forms Calculations
Gravity Forms calculations offer a ton of functionality. Here are some ways you might do calculations in Gravity Forms form submissions:
- Displaying data on the front end
- Form field calculations
- Product pricing
- Survey calculations
- Displaying data in charts and graphs
- Date and time calculations
- Calculations based on conditional logic
Performing Calculations in Gravity Forms
Gravity Forms gives you the power to perform calculations based on user input values. Where there isn’t a dedicated calculator form field, calculations are available using two functions: the Number field and the Product field. Everything is managed from the standard Gravity Form’s form editor.
1. Gravity Forms calculations using the Number field
Using Gravity Forms’ drag-and-drop form builder, add two different Number fields to a form. Name them “First Number” and “Second Number.” Now save the form so the fields are available in later steps.
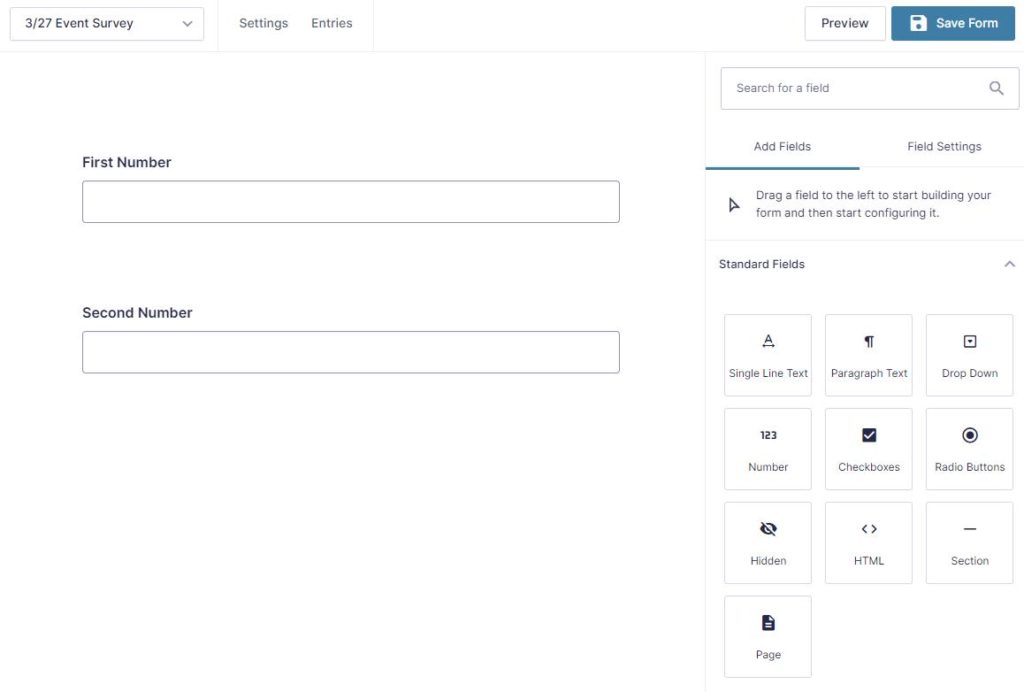
Next, add a third Number field to the form. Call this “Total.” Make sure it’s positioned after the other Number fields. In the field settings, select the Enable Calculation checkbox so the field can be populated by the calculation. Additional options will appear.
Still in the field settings of the Total field, click the button Insert Merge Tag and select the First Number field. The merge tag will appear in the editor below. Add a mathematical operator (such as the plus sign) and then use the Insert Merge Tag button again to include the Second Number field.

You can check your formula by clicking the Validate Formula link. If it says that your calculation is invalid, review your formula to ensure it’s correct.
2. Gravity Forms calculations using the Product field
You can also perform Gravity Forms calculations when selling products. We first recommend reading Gravity Forms’ full guide on selling products (to learn the basics of form building). This will help you build an effective form, including how to set prices.
When you sell products, the Total field will automatically calculate the total cost of all items in the order based on the quantities of different products. You don’t have to do anything special in the form editor screen to this field to get this type of conditional logic.
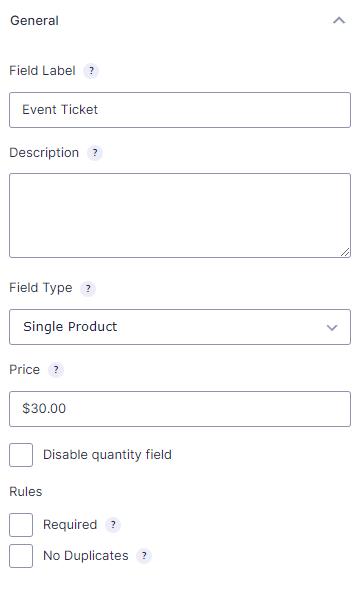
But you can use the Product field to run calculations. For example, let’s say you’re selling event tickets for $30 a piece, but want to add a 20% VAT to each product.
First, add a Product field for the actual product. Save the form so it updates.
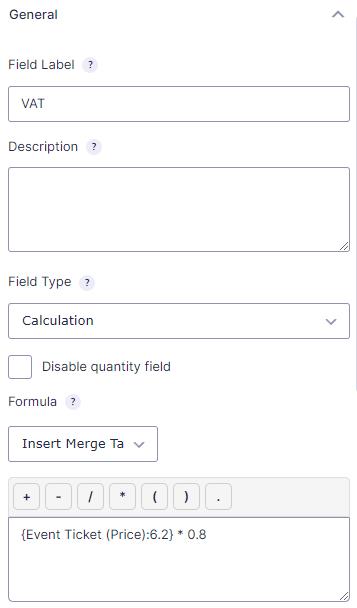
Then add a second Product field for the VAT calculation. In the field settings, change the field type to Calculation. Then click Insert Merge Tag and select the first field’s price. Use the editor to add math operations.
As you can see, if you’re good with basic math, you can create any type of fields calculations you need: from basic calculations to advanced calculations! The form builder plugin will even include the calculations in the email notifications. Just make sure your forms have all of the other important fields as well, like the email field, name field, checkbox field, etc.
Gravity Forms Calculations with GFChart
Just as sports venues have scoreboards, most databases need dashboards! With GFChart you don’t need to be an expert PHP developer to produce basic Gravity Forms calculations from submissions. You can perform mathematical functions and turn your Gravity Forms entries into actionable data by creating professional WordPress charts and graphs. This is a great way to display calculations and produce a truly powerful user experience.
You might need Gravity Forms calculations for…
- Events bookings or course registrations tracking
- Sales – both unit sales and revenue
- Fundraiser progress
- RSVP counting
- Sales monitoring
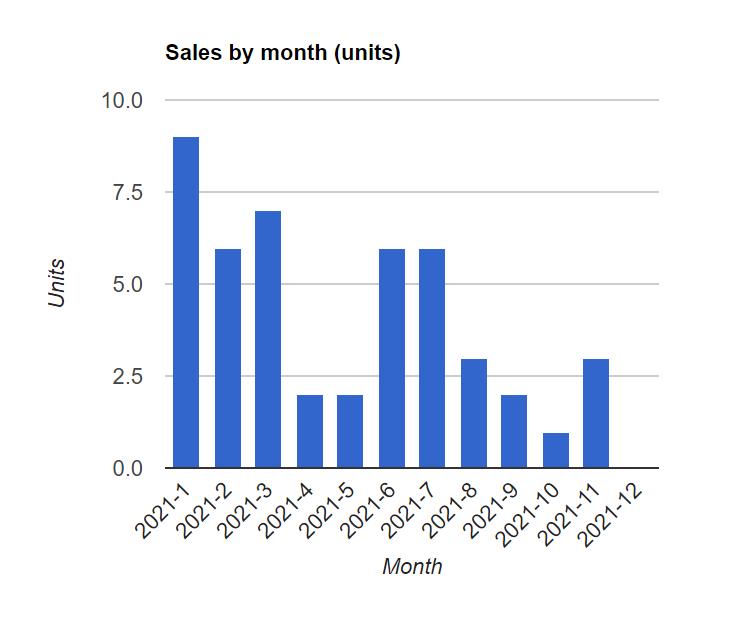
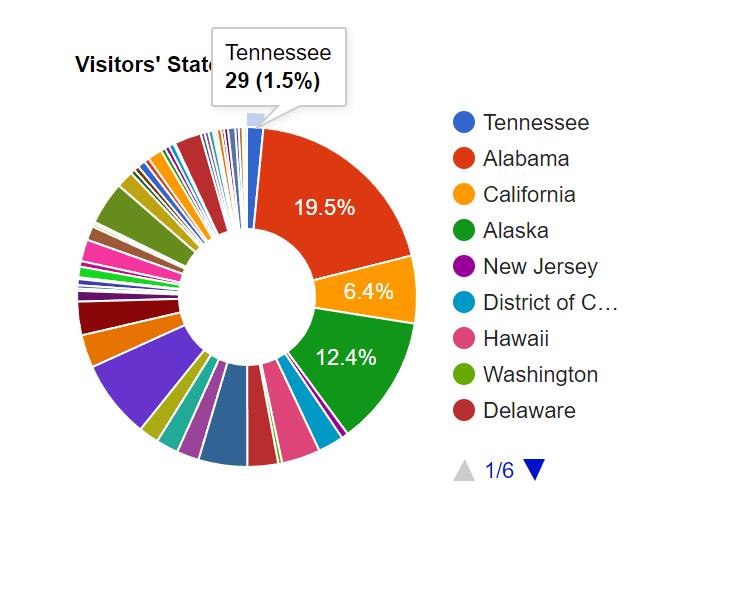
For instance, you could use GFChart to calculate sales form entries and present them as a graph.
Or you might calculate and display survey results.
With GFChart, you can use our no-code interface to build your desired calculation. You can then publish your Gravity Forms calculation on a page, post, or widget using our Gutenberg block or classic simple shortcode.
Additionally, GFChart gives you access to powerful filters to restrict the data set (e.g. registrations last week). You can even build complex dashboard tables using HTML/CSS.
Here’s how it works:
Step 1. Get the WordPress plugins
Before you can make your own WordPress chart, you need two WordPress plugins: Gravity Forms and GFChart. Both come with a small cost, but the reliability and automation they provide are priceless.
Step 2: Create a Gravity Form
Create a Gravity Form and submit some entries. You may have an existing form that will work. Read Gravity Forms’ guide on the form creation process if you’re new.
Step 3: Create the chart or graph
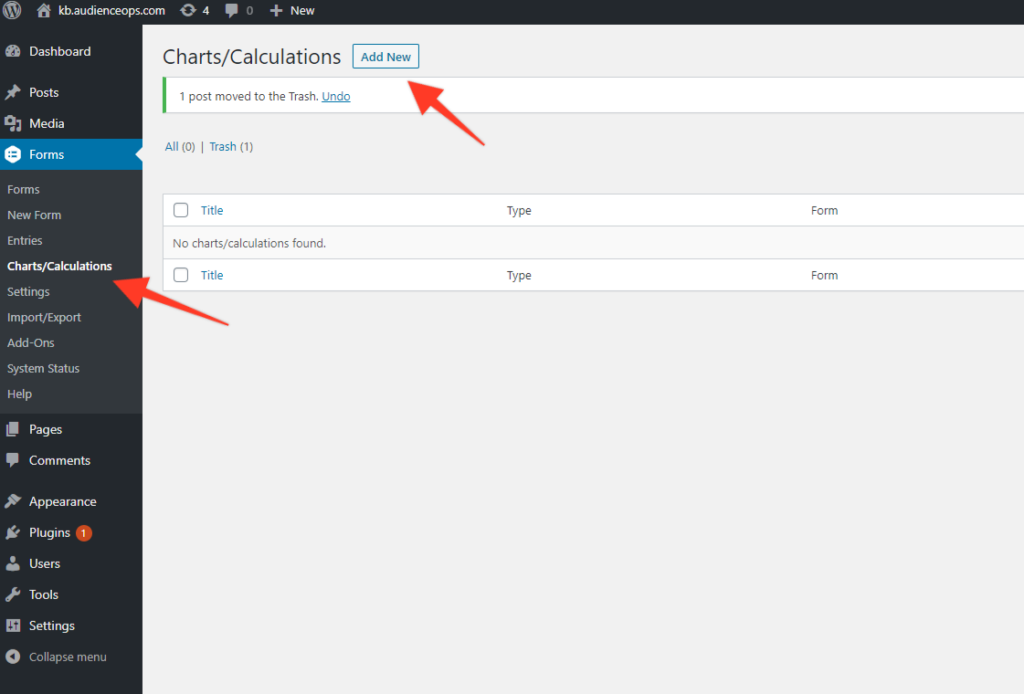
Begin building the calculation by clicking Forms > Charts/Calculations in the left-hand menu of your WordPress backend to reach GFChart’s graph builder. Click Add New to get started. Give it a distinct name.
Once you’ve chosen a name, select the Gravity Form from which the chart will pull data. Then click Create Chart/Calculation.
Step 4: Configure your WordPress chart or graph
GFChart is a simple plugin that will help you build Gravity Forms calculations. In the chart builder, you’ll see four tabs: Design, Select Data, Customiser, and Preview.
Choose your chart, graph, or calculation type in the Design tab. You could choose a standard calculation or something more visual, like a pie chart, bar chart, progress bar, and more.
The Select Data tab is where you’ll map the individual elements of your chart. Use these fields to help GFChart understand how to display your Gravity Form fields.
You can preview your calculation’s design in the Customiser tab. And the Preview tab is a visualizer where you can preview your chart before publishing it.
Step 5: Publish the WordPress chart to a page or post
Your final step is to make your calculation visible on your site. Adding it to a page, post, or widget area is simple with GFChart.
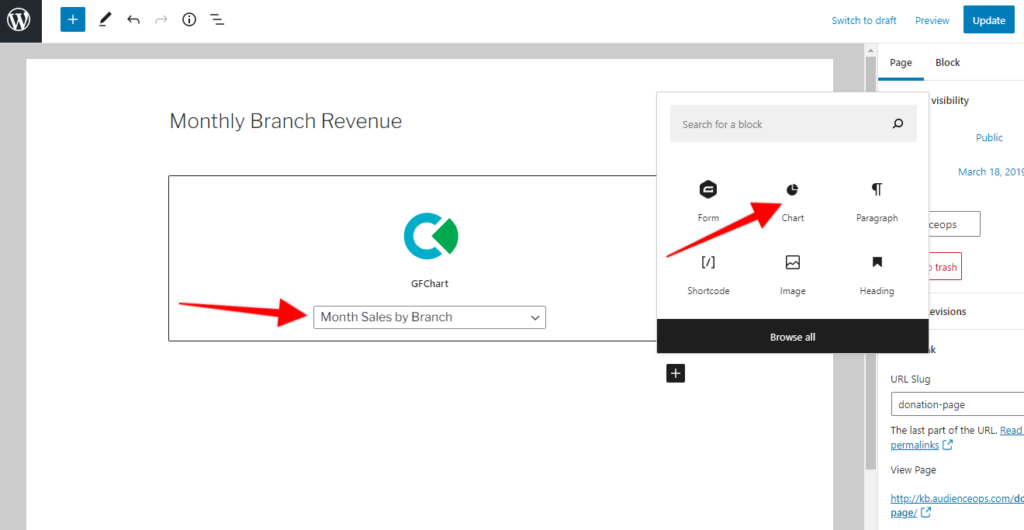
The easiest way is to use the GFChart Gutenberg block editor. Click the plus icon and choose the Chart block. When the block appears in the content editor, use the drop-down menu to select the chart you just created.
Alternatively, you can embed a calculation using a chart shortcode. There is a unique chart shortcode for each GFChart. You can find it in the chart editor.
Step 6: Preview your page
Your final step is to verify your Gravity Forms calculations on a live page. The chart itself will look exactly like its appearance in the chart builder’s preview tab, but you’ll need to make sure it fits well into your page design.

Make Your Own Gravity Forms Calculations
We’ve shown you a few helpful ways to make your own Gravity Forms calculations. It’s a powerful plugin with a lot of versatility. We suggest using all of its advanced features to get the most value out of your purchase.
Ready to display your Gravity Forms calculations? Get GFChart today.