
This tutorial explains how to build an assessment quiz with live reporting. These are instructions for producing this, specifically. A solution overview is here.
Assessment quizzes are powerful tools to generate leads and deliver valuable content to your audience.
1. Overview and Preparation
In this first step, we’ll look at an overview of the assessment quiz and report. Then we’ll cover what you need to get started. Here’s what it looks like:
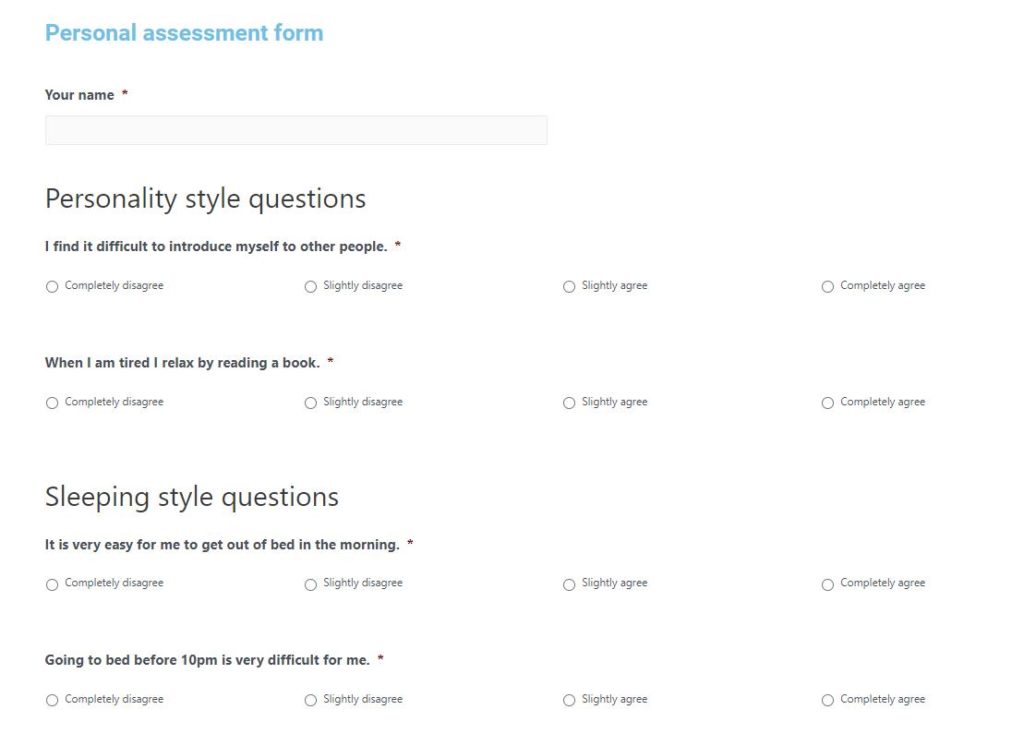
Notice how the form starts with a name field. We recommend asking some basic questions at the start of the form, so you have a way to contact each submitter in the future. Then the assessment quiz uses a list of easy-to-answer multiple-choice questions.
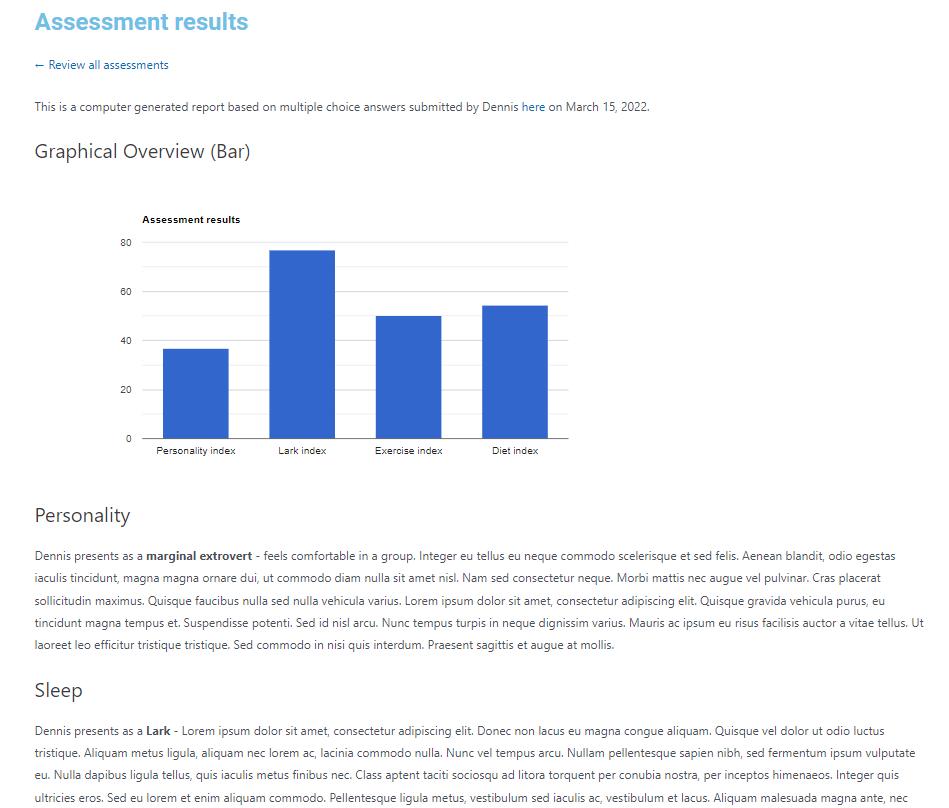
Click here to see the finished form built in this tutorial. Feel free to test that form by filling it out yourself. You’ll get something like this, but your results will vary depending on how you answer each question.
In order to build an assessment quiz and report like this, you’ll need a few plugins:
- Gravity Forms – This is used to make the form.
- GFChart – This is used to make the report.
- GravityView – This allows you to display individual form entries.
- GFChart GravityView Add-on – This add-on integrates GravityView and GFChart. You’ll need the GFChart ALL license for this.
This tutorial uses GravityView’s DIY Layout Add-On, but that isn’t required. It’s just easy to use. If you want to filter your entries only for the logged user, you’ll also need the Advanced Filter Extension from GravityView.
For a step-by-step walkthrough, watch this video:
2. Create the Assessment
Now it’s time to create the assessment. To create a new form, visit Forms > New Form in your WordPress backend. Give your assessment form a name in the window that appears and then click Create Form.

Start by adding some basic fields to help you learn about the form submitter, such as the Name and Email field. Depending on your needs, you might ask deeper questions about their family size, income, job title, etc. Even though this is an assessment quiz, it’s still an opportunity to create a lead for your sales funnel. Just don’t overwhelm the submitter with too many questions.
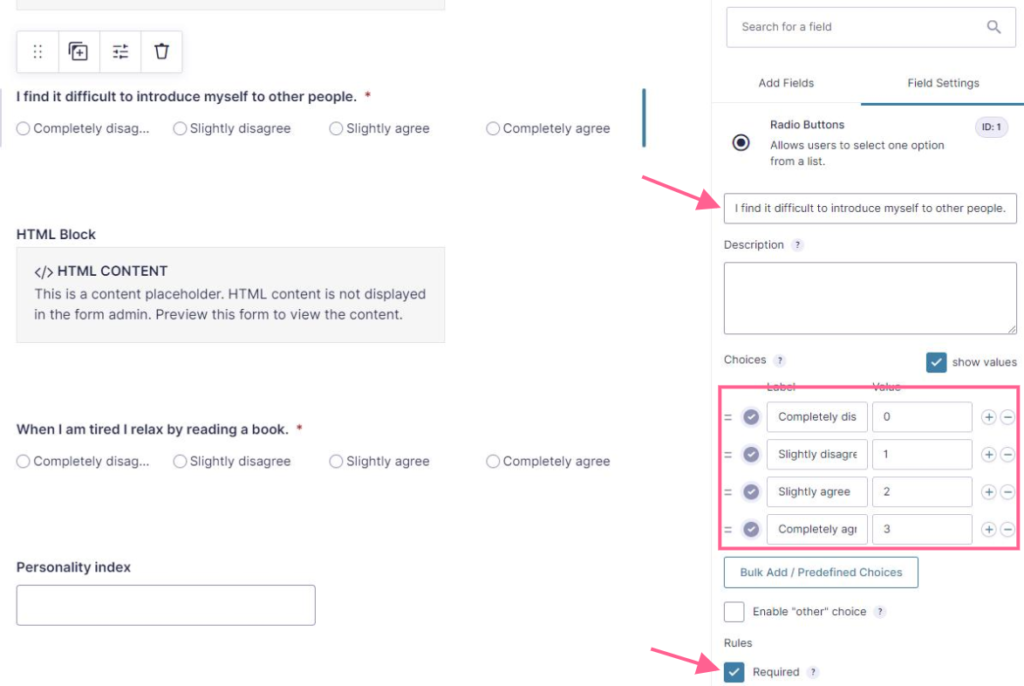
Next, add radio fields for your assessment questions. Add your assessment statement to the Field Label, write the individual statements as choices, and give each choice a value. (The form will need these values to calculate the answers later, so don’t skip this.) Finally, make sure to mark each field as required.
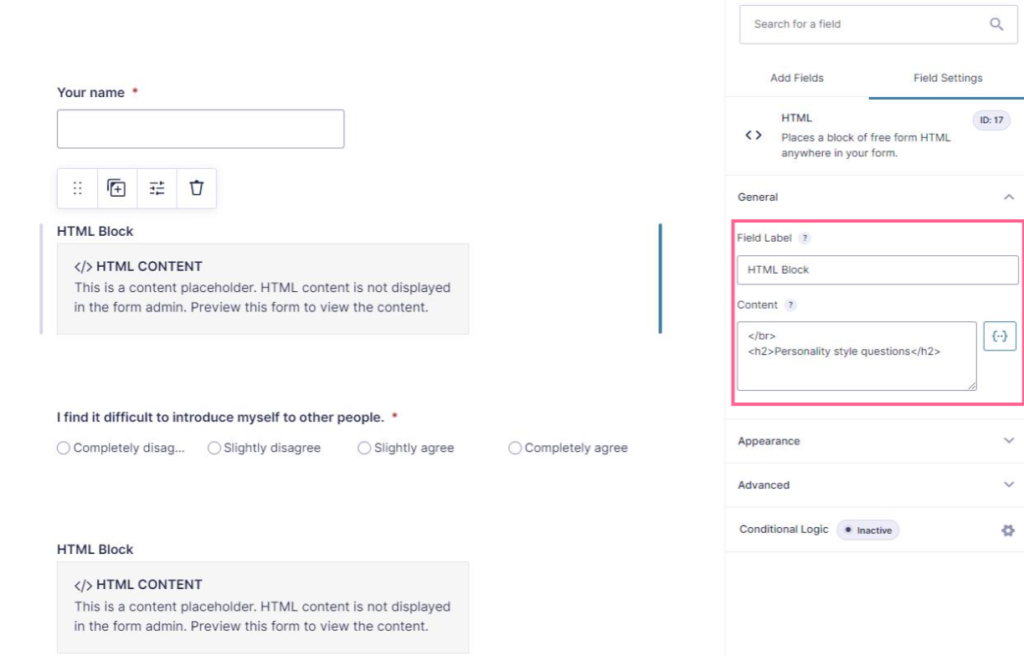
For formatting purposes, it helps to add some HTML Blocks within the form. In this case, we’ve added a link break and a heading to keep our content organized.
Remember, the real value of an assessment quiz is that it calculates user submissions and offers a custom response. So your next step is to complete the calculation. You can do this by adding a Number field. In this field, make sure to check the Enable Calculation. In the Advanced tab, set the Visibility to “administrative” (this means front-end users can’t see it).
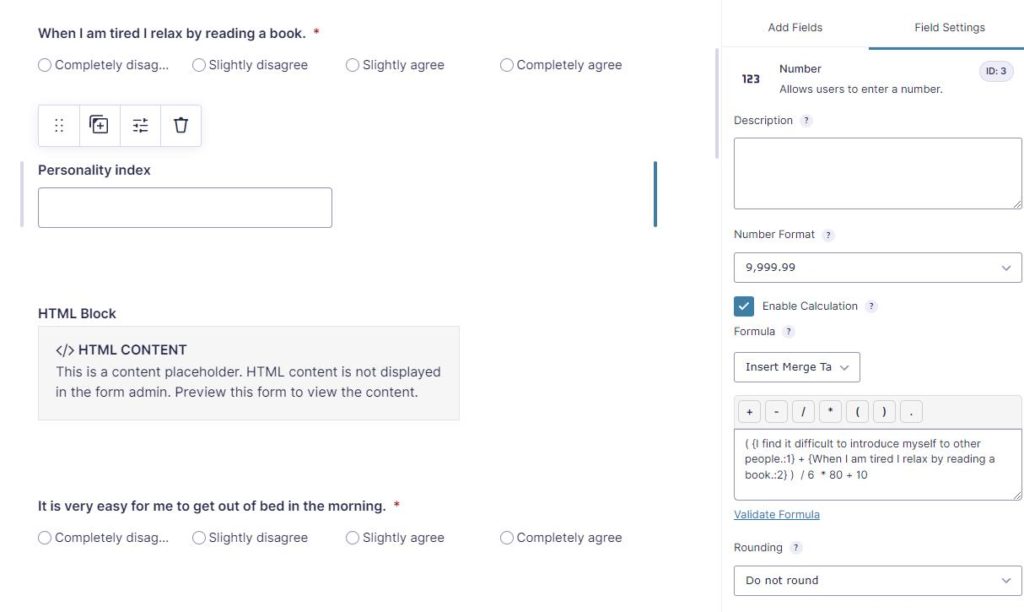
You’ll also notice an empty text box in the Number field. This is where you’ll supply the math equation that the form will use to determine the appropriate response.
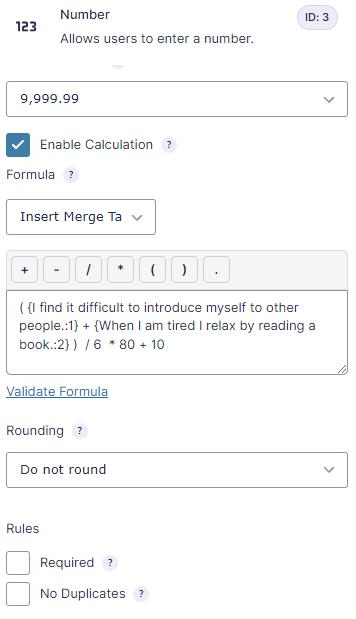
In the case of our form, we have two questions, each with multiple-choice options. The values of those options are 0, 1, 2, and 3. The first step of the equation is to add those two values together and divide them by two to find their average. Then since the maximum value is 3, we have to normalize it by dividing by 3. Then we multiply it by 100 to convert it to a percentage.
Score = [ (x1 * x2)/2 ] * ⅓ * 100
For cosmetic reasons, however, you may not want users to score 0 or 100. Instead of multiplying by 100, You could force the lowest score to be 10 and the highest to be 90 by multiplying by 80 and adding 10 (as shown in the above image).
Repeat this process for other groups of questions you may want for your assessment form. If you look at our sample form, you’ll see four groups of questions. Each group includes its own calculation. There’s also an overall calculation that simply averages the results of the four groups.
Once your form is complete, hit the Save Form button.
For a step-by-step walkthrough, watch this video:
3. Create the Report
Now that your form is created, the next step is to create the report that users see after they submit the form. We’ll do this using GravityView.
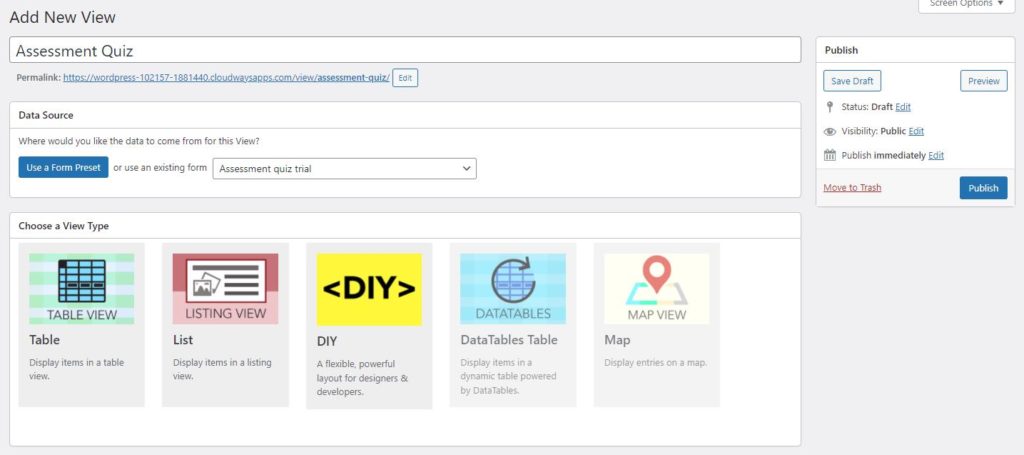
Click Views > New View to get started. Give it a name that relates to the assessment quiz. Select the form you just created from the drop-down list. Then choose a View type. The basic version of GravityView only offers the Table and List Views. In this case, choose the List View.
GravityView lets you display form entries on a page. There’s a format for multiple entries, single entries, and editing individual entries.
First, scroll to the bottom and uncheck the box labeled “Show only approved entries.” (By default, only approved entries are displayed in a View. This setting prevents unapproved or disapproved entries from appearing in results when enabled. If disabled, entries with all approval statuses will be visible, including disapproved entries.)
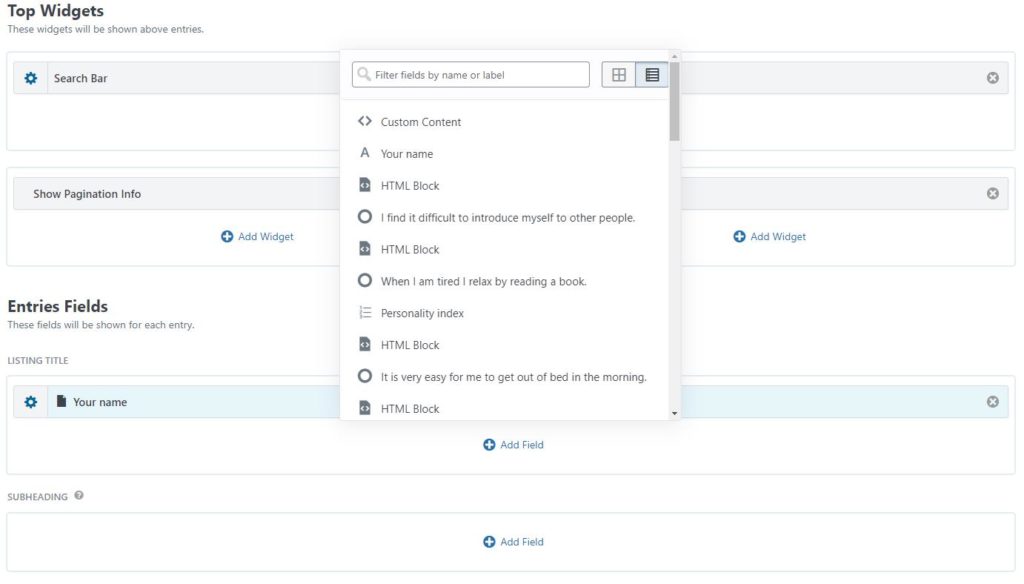
Next, jump up to the top, but stay within the Multiple Entries tab. This is where we customize how a group of entries will look. Under Entries Fields, click Add Field. In the popup, select the Name field that you added to your form earlier.
Next, jump over to the Single Entry tab. This is where we customize the appearance of a single entry. In the Other Fields section, add the Name field, as well as the Chart field.
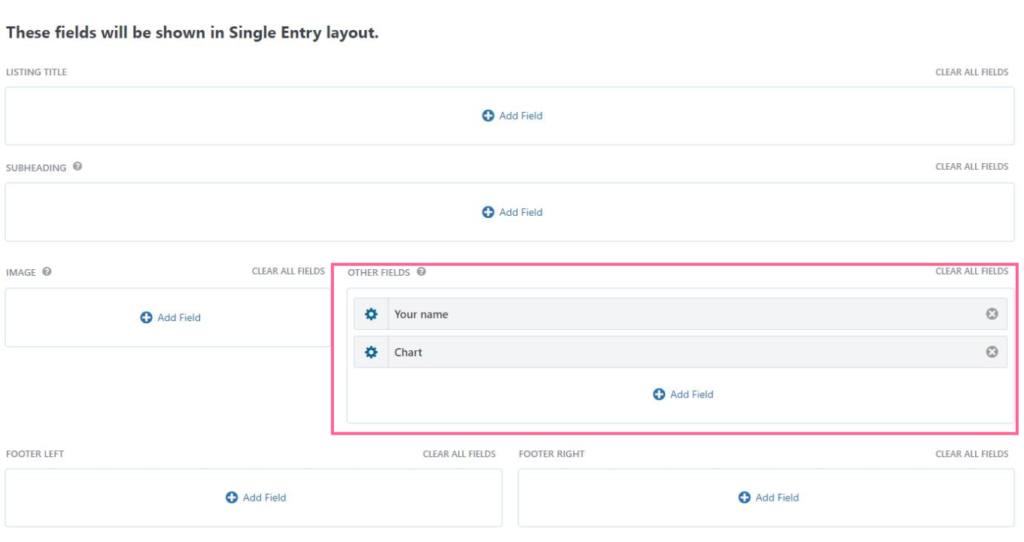
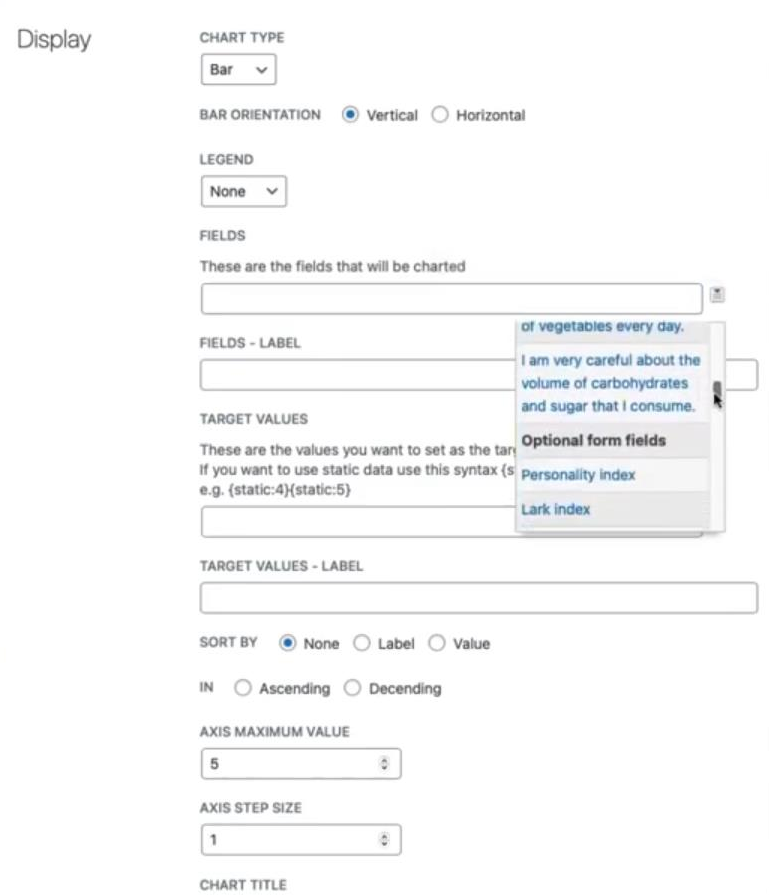
You’ll need to adjust some settings within the Chart field. Choose a Bar chart with a vertical orientation (so the bars go up and down). In the Fields text box, you’ll need to choose the Number fields that you built in the form. Add them by listing their merge fields. You can find the merge fields from your form by clicking the drop-down button that sits to the right of the empty text box.
The fields referenced by your chart will look something like this:

Now if you visit the View’s page (click the permalink beneath the View’s title), you’ll see a list of entries. These are the users who submitted your form. When you click on an entry, you’ll see the chart for that individual entry.
The last step in creating our View is to add the custom text that displays based on the submitter’s score. In the Single Entry tab, add a Custom Content widget. A popup will appear that includes a custom content box. You’ll need to use GravityView’s custom logic to display certain text based on the form’s values. You can also use merge tags to add form data directly into the text.
In our example, we start with this phrase:
{Unique survey label:27} presents as a
That merge tag refers to the submitter’s name. On the public page, it will appear like this “John Doe presents as a”
Next we have this bit of logic code:
That’s the GravityView logic. It will only display what’s inside those tags if the criteria are met. In this case, the criteria is a score less than 30. If the score is 30 or more, GravityView won’t display the content. Instead, it will look for the next piece of content until it finds one with the appropriate criteria.
The next section would look like this:
Notice how we need to add a “2” to the gvlogic tag when we nest them. Continue to add text until you create criteria for all possible scores.
For a step-by-step walkthrough, watch this video:
4. Link and Test
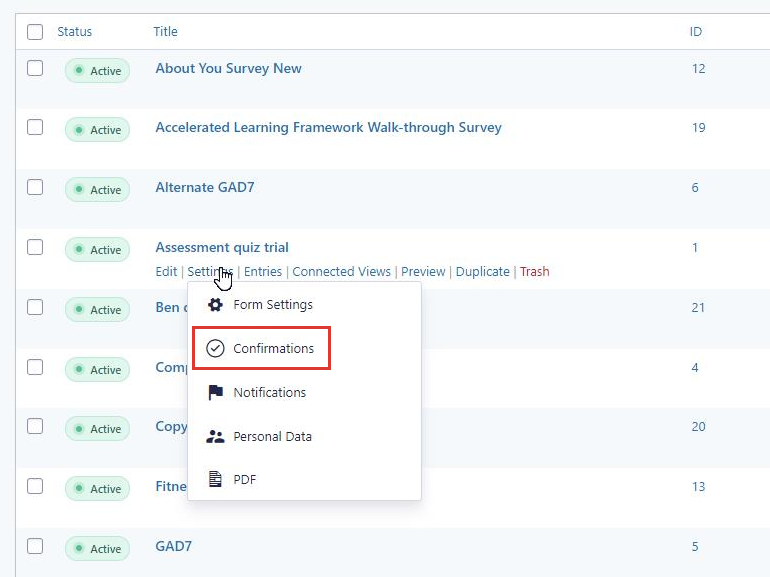
Now that your form and Views are set up, the final step is to link and test the form and report. Visit Forms and find the assessment form you made at the beginning of this tutorial. Don’t enter the form editor, however. Click the Settings link and enter the confirmation editor.
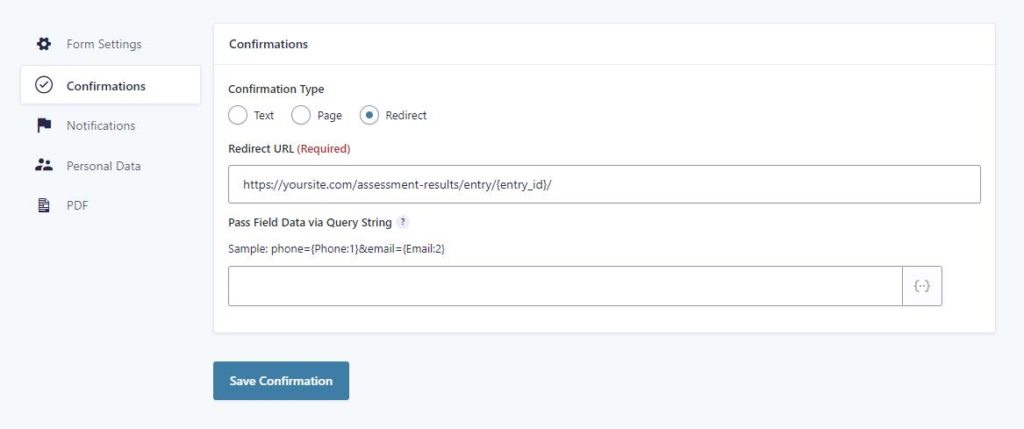
Edit the default confirmation. Set it up as a redirect. Make sure it looks like the format in the following image. It must include a merge code to ensure that it will move straight to the single entry view we configured earlier when the submit button is pressed.
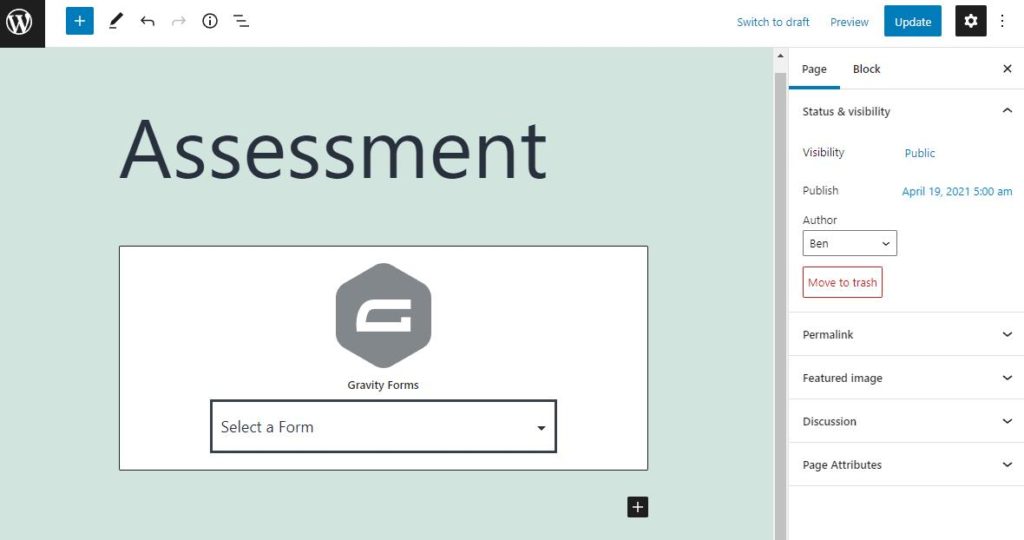
Your final step is to add your assessment form to a page. Visit the editor of any page or post where you want the form to appear. Use a Gravity Forms block to add the form to the page. Use the drop-down selector to choose your assessment form.
Save the page and view it to test your form. We highly recommend completing the form once yourself to ensure it works properly. Ensure that the conditional information that appears (the text you set up using GravityView’s logic) is accurate.
For a step-by-step walkthrough, watch this video: