
Are you looking to create a job application form for your WordPress website? There’s no need to pay for expensive third-party services. You can build a high-quality job application form that you have complete control over using just two common WordPress plugins.
This tutorial shows you how to create your own job application form and build a live reporting dashboard for your hiring team.
Are you looking to create a job application form for your WordPress website? There's no need to pay for expensive third-party services. Share on XStep 1. Install the Necessary Plugins
Before you get started, you’ll need to install two plugins: Gravity Forms and GFChart. If you’ve never installed a WordPress plugin before, check out this guide.
Step 2. Create a New Form
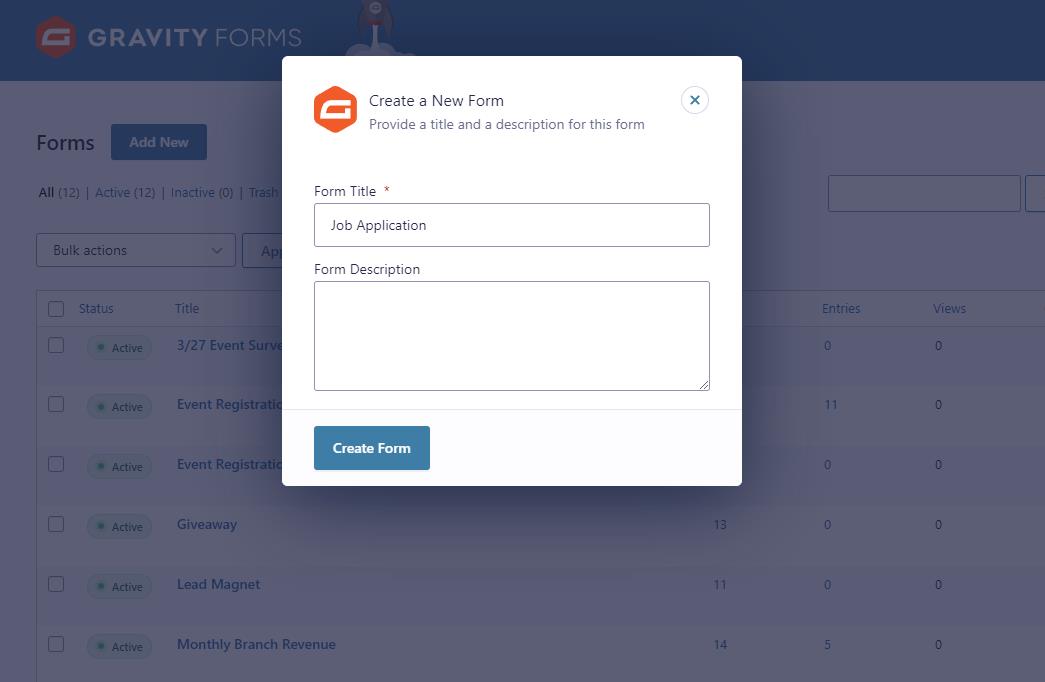
In your WordPress back end, click Forms > New Form. A popup overlay will appear. Give your form a name that distinguishes it from other forms.
3. Customize Your Form Fields
In this step, you’ll add fields and other elements to your job application form. If you want a shortcut, consider taking advantage of the Gravity Forms template library. It’s full of free templates you can quickly import to speed up the form creation process, such as the Employment Application form template. To use this template, click on the Get this Form Template to download a .JSON file. Then visit Forms > Import/Export > Import Forms in your WordPress dashboard. Choose the file you just downloaded and click Import.
Before you start adding forms, it’s a good idea to plan out what you need to create them. Consult with your team to make sure you’re asking for the correct information and wording your questions appropriately. For instance, consider grouping your questions by category: personal information, employment history, education, etc.
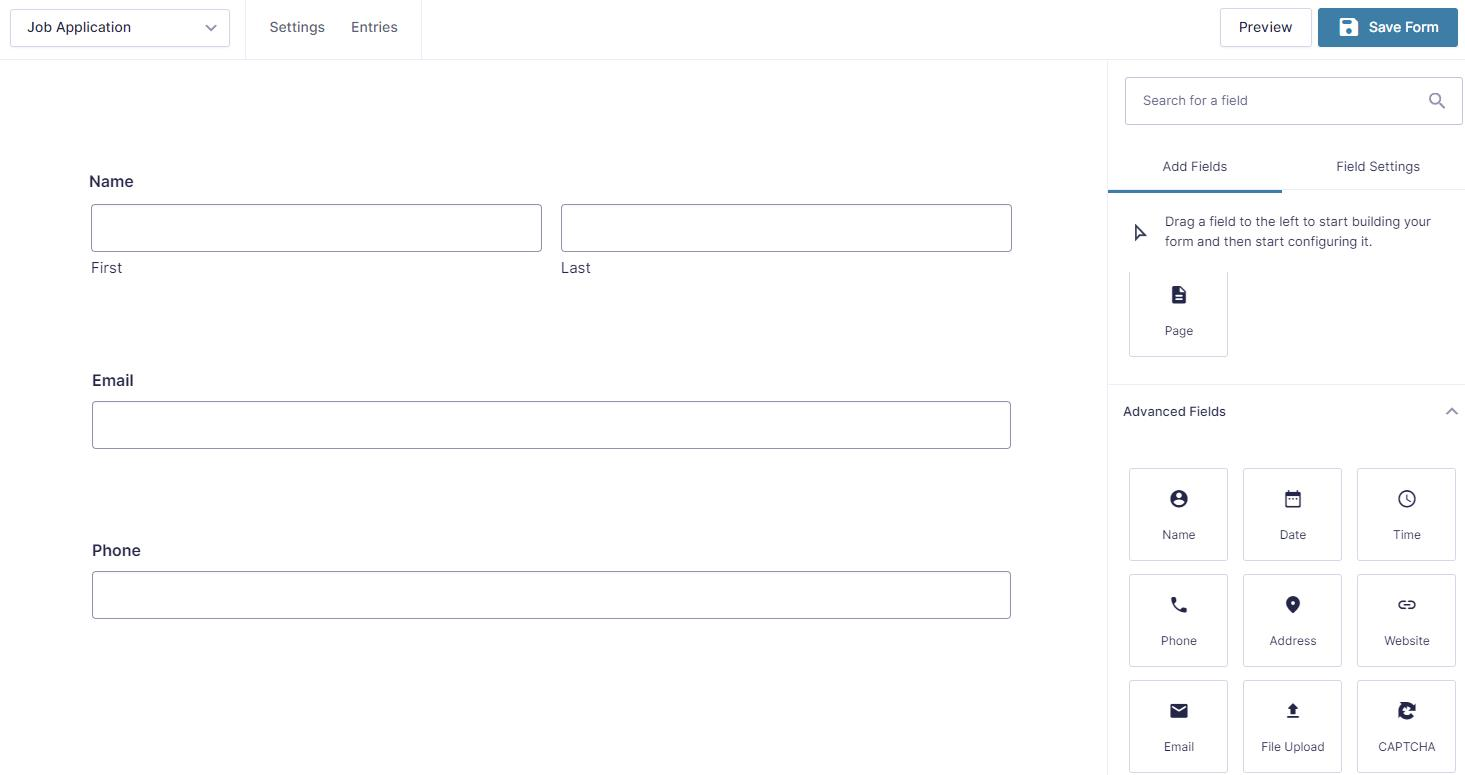
Add your fields one-by-one by dragging the appropriate field type from the right side of the form editor. It’s smart to start with basic fields to capture the applicant’s personal information, such as their name, email address, and phone number.
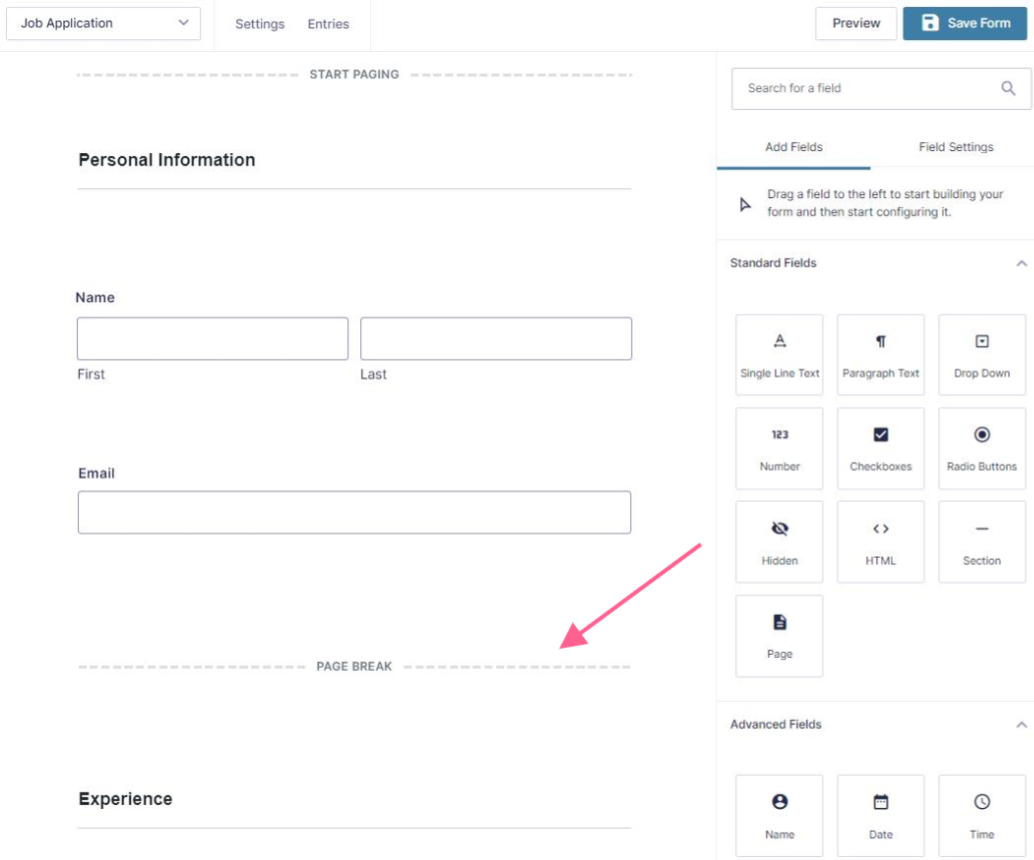
If your job application form is long, consider breaking it into multiple pages. Doing this creates a more user-friendly experience. Add the Page field to your form and move the page break marker to where you want the form to split. Add Section fields to give each page its own title.
You should also consider using conditional logic to hide some fields. For instance, after your first set of education fields, you could follow with a checkbox that says, “Did you attend another school?” If the applicant selects “yes,” additional education fields would appear.
When you’re satisfied with your form, click the Save Form button to save.
4. Set Up Confirmations
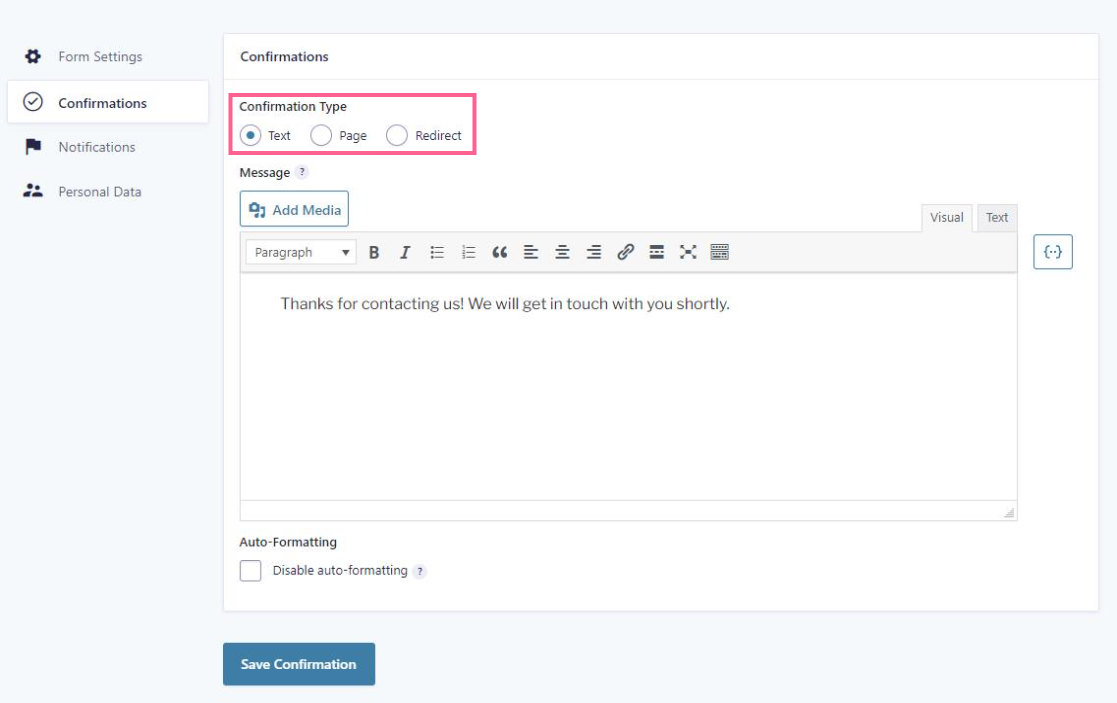
A confirmation is a message that the submitter sees to confirm their submission. Gravity Form’s default confirmation (“Thanks for contacting us! We will get in touch with you shortly.”) is probably suitable, but you might want to change it to something like, “Thanks for applying!” Visit Settings > Confirmations and click Edit under the default confirmation.
You have three confirmation-type options. You can set it to “Text,” in which case you can edit the text in the text area. You can also choose “Page” and select a page on your WordPress site, or choose “Redirect” and add the URL of any page.
5. Set Up Notifications
A notification is an emailed message to let you or anyone else know that someone submitted a job application. You may want the hiring manager to receive a notification. It’s also a good item to send to the applicant, so they have a copy.
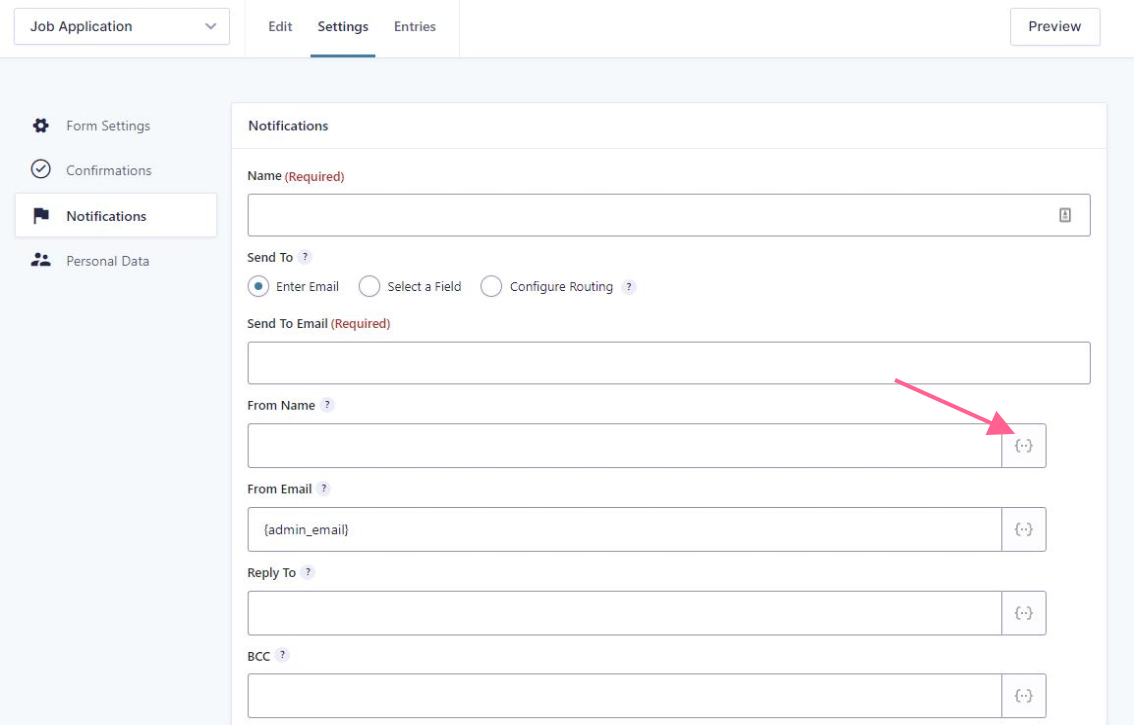
To set up a notification email, visit Settings > Notifications. Click Add New to create a new notification. You’ll need to complete each field here. You can use a merge tag (the button to the right of the field) to add form data to it for several fields. For example, you probably want to include the “All Submitted Fields” merge tag in the message box to display all submissions.
6. Add the Job Application to a Page or Post
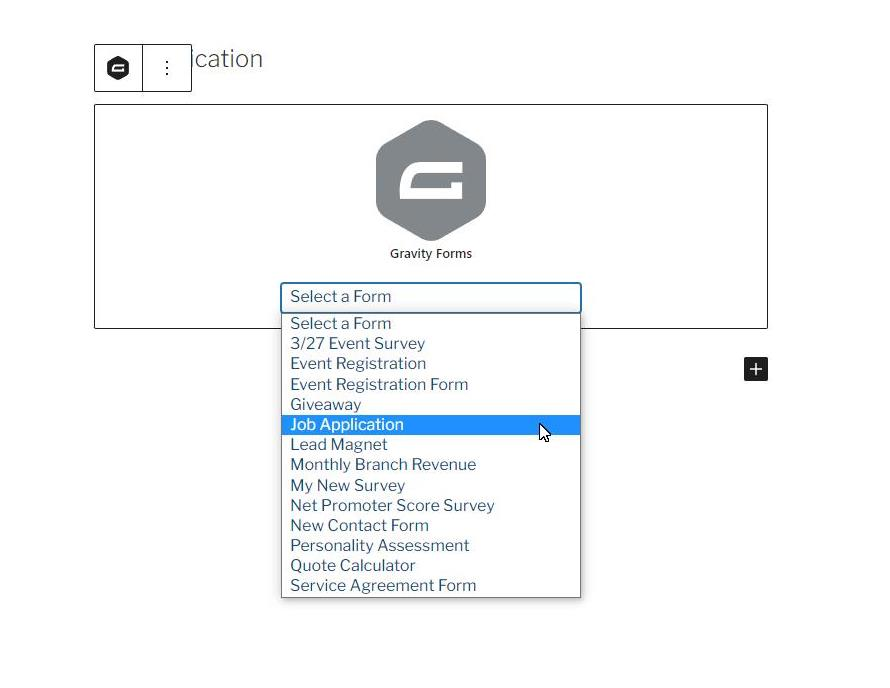
Now that your form is complete, you’ll need to add it to a page or post so applicants can find it. Visit the editor for the page/post where you want the form to appear and add the Gravity Forms block. Select the job application form you just created.
It’s a good idea to add other elements to this page, such as the job description for this position, the hiring process, and any additional information pertinent to the job applicant. Once you’re happy with the page, click Publish.
7. Create the Report
Now that your form is active, the next step is to build the reporting dashboard for your hiring team. This report provides them with more information about their applicants that wouldn’t usually be available when looking only at applications individually.
You can chart any measurable response of the applicant. You can’t chart a text field, so if you wanted to see how many applicants have college degrees, you would need to add a “highest level of education” field that offers options like secondary school, bachelor’s degree, master’s degree, etc.
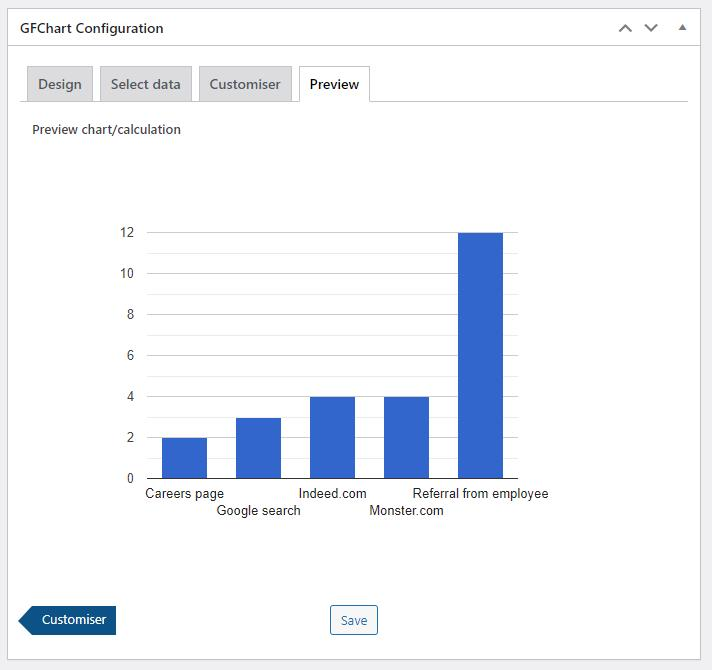
For this example, let’s say our job application form has a field we want to chart that asks, “Where did you hear about this opportunity?” The options are Google search, a referral from an employee, the website’s careers page, Indeed.com, and Monster.com. This information would help the hiring team understand from where applicants are coming.
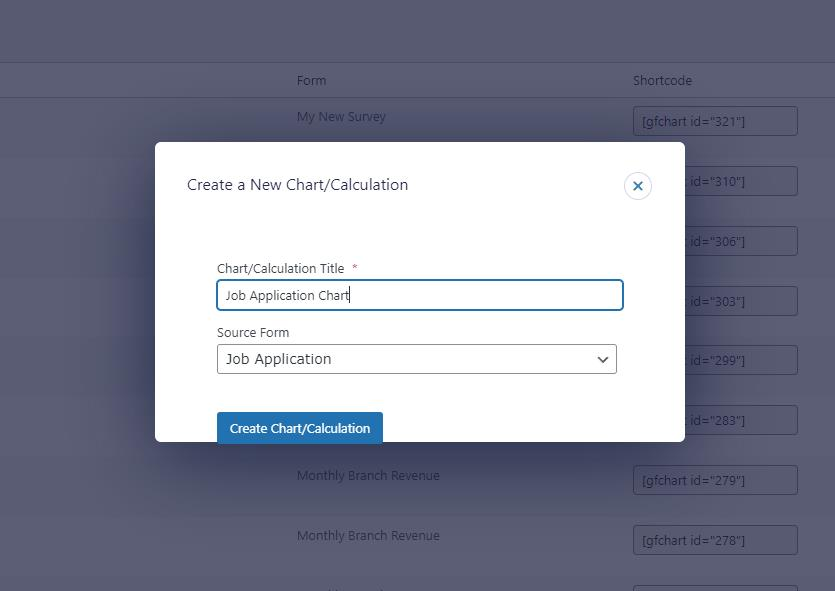
To create a chart, visit Forms > Charts/Calculations. Give your new chart a name that distinguishes it from other charts you might create. Then select the form that is the source of this chart (the job application form you just created).
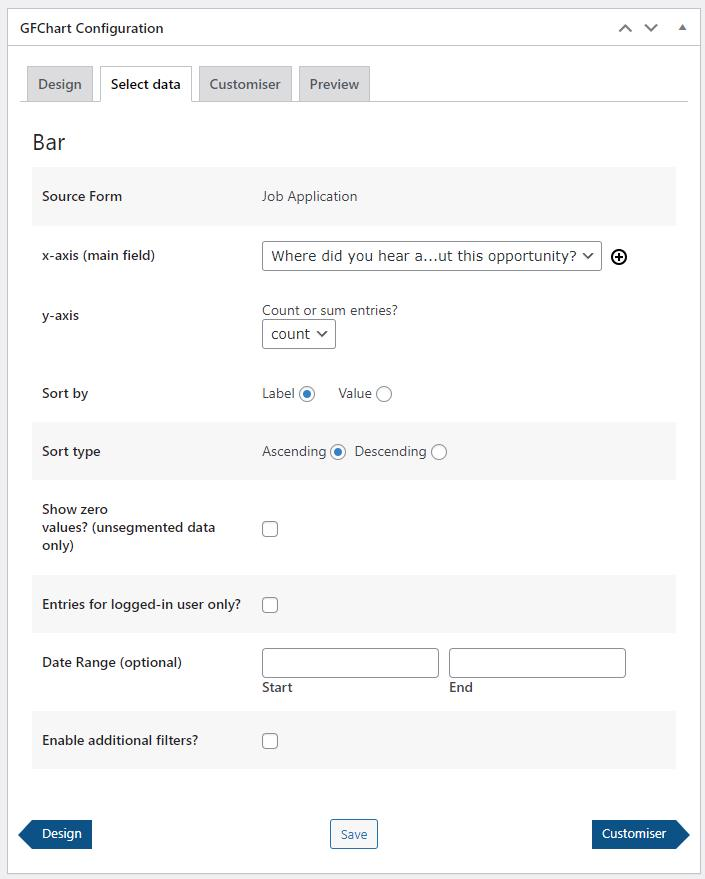
The chart builder divides into four tabs. On the Design tab, choose the type of chart you’d like to create. In this case, a bar chart is most suitable. Upon selecting a chart type, some more options will appear below. You’ll need to choose a vertical or horizontal orientation for bar charts.

The Select Data tab is where you map your form’s fields to the chart. Since we’re charting the “Where did you hear about this opportunity?” field, we set that as the x-axis. The y-axis will count the entries.
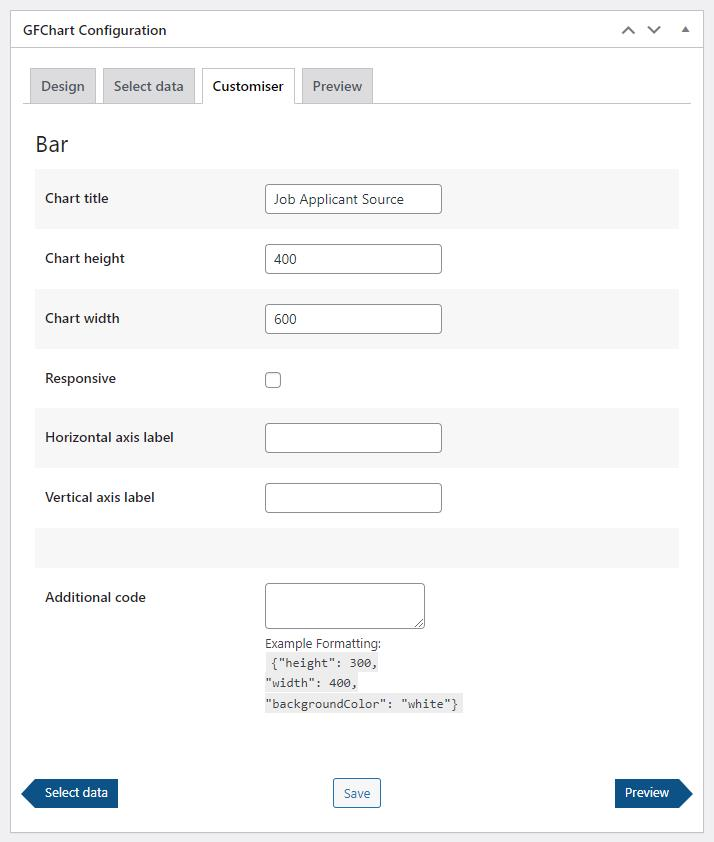
The Customiser tab is where you adjust the look of your chart. You can change the height and the width to match the content area of your site. You can also add custom CSS code to make the chart fit perfectly with your theme, though this isn’t necessary.
The Preview tab is pretty straightforward. It’s where you can preview your chart before publishing it. Make sure the data is accurate. Keep in mind that this will only show data if you have submissions.
Once you’re happy with your chart, click Publish. The final step is to add your chart to a page for your hiring team to access. Simply visit the page or post where you want the chart to appear, and use the Chart block to publish your chart.
Going Forward
A job application on your own WordPress site is a great way to collect candidates without paying a fee to third-party sites like Indeed or Monster. The tutorial we explained in this article gives you everything you need to build a practical job application with live reporting.