
Customer satisfaction surveys help you gauge how your customers feel about your company or their experience with your company. They are helpful tools for measuring satisfaction scores over time and finding insights to improve the experience.
In some cases, customer satisfaction surveys use a scoring methodology to translate the responses into a number for each customer, called a Customer Satisfaction Score (CSAT). Doing this creates an easy way to determine the satisfaction of each customer, customer segments, and your customer base as a whole.
This tutorial teaches you how to create a customer satisfaction survey using Gravity Forms and a live report of the results using GFChart.
Before you get started, you’ll need to install two plugins:
- Gravity Forms: We’ll use this to create the survey.
- GFChart: We’ll use this to create the live report.
While you don’t need the Gravity Forms Survey Add-On, it will make your customer satisfaction survey more useful. This add-on comes with the Elite License.
If you’ve never installed a WordPress plugin before, check out this guide.
How to Create a Customer Satisfaction Survey
Our first component is the customer satisfaction survey. Let’s walk through the steps.
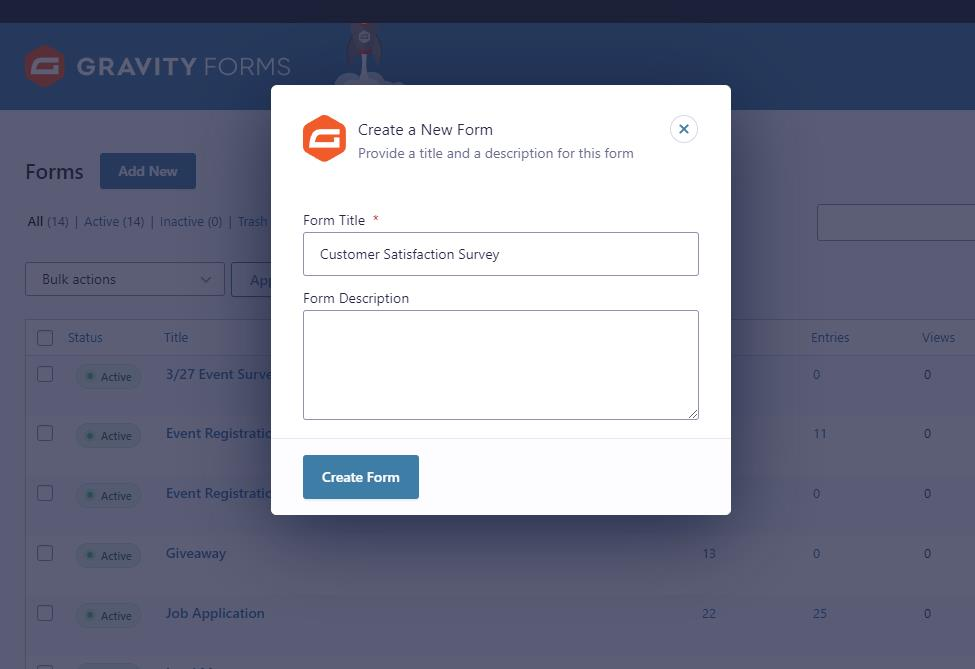
Step 1. Create a New Form
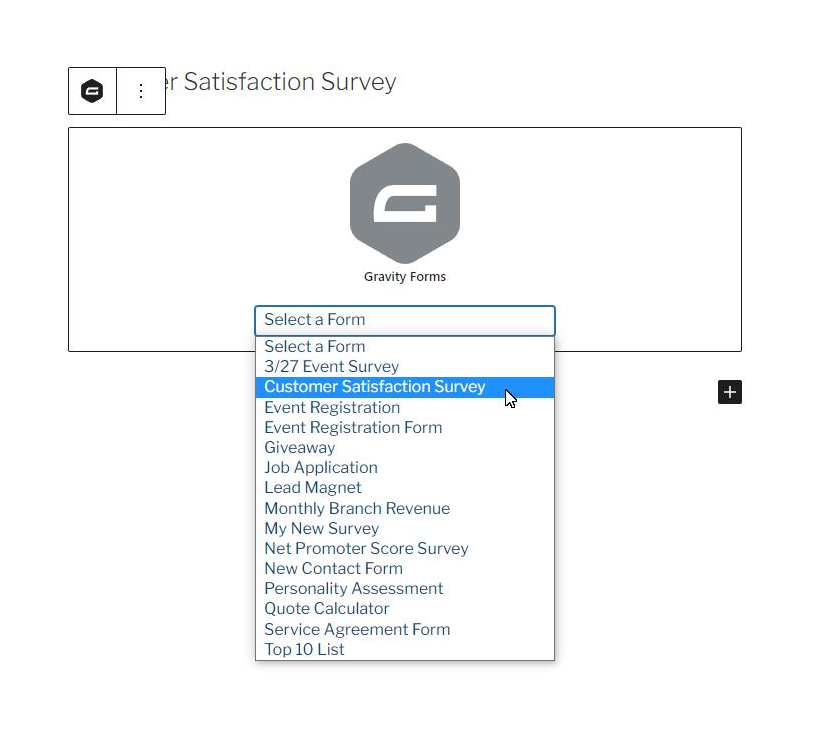
In your WordPress back end, click Forms > New Form. A popup overlay will appear. Give your form a name that distinguishes it from other forms, and then click Create Form.
Step 2. Add Customer Survey Form Fields
First, add some basic fields to capture the applicant’s personal information, such as their name, email address, and phone number.
Then add fields and other elements for your customer satisfaction survey. It’s a good idea to plan what you need before building. Consult with your team to make sure you’re asking for valuable information and wording your questions appropriately. Add fields individually by dragging the appropriate field type from the right side of the form editor.
What kinds of questions should you ask? Getting actionable information requires good questions. These question types will help you effectively measure customer satisfaction.
- Likert scale – These are flexible questions that you can use to measure sentiments, feelings, desirability, or frequency. Customers can choose a response from a range of options, such as “strongly agree,” “agree,” “neutral,” etc.
- Open-ended questions – These let customers share their thoughts and opinions or offer new ideas. “What do you like most about our new product?” is an open-ended question. These are useful, but hard to measure in the aggregate.
- Binary scale questions – These limit the submitter to two answers per question. Submitters may choose “yes” or “no,” or select a thumbs up or a thumbs down image. Example: “Did you find all the products you wanted to find? Yes or no.”
- Usage frequency questions – These help you determine how often or how long customers use a product, perform an activity, visit a store, or take other actions. Example: “How often do you visit our Bloomington location?”
Here’s an example of a Likert question. This image shows the agree/disagree scale, but you can set these response options to anything you like. You could even set them to a range of numbers and ask, “How likely are you to recommend our company to a friend?” (This is a typical net promoter score question.)
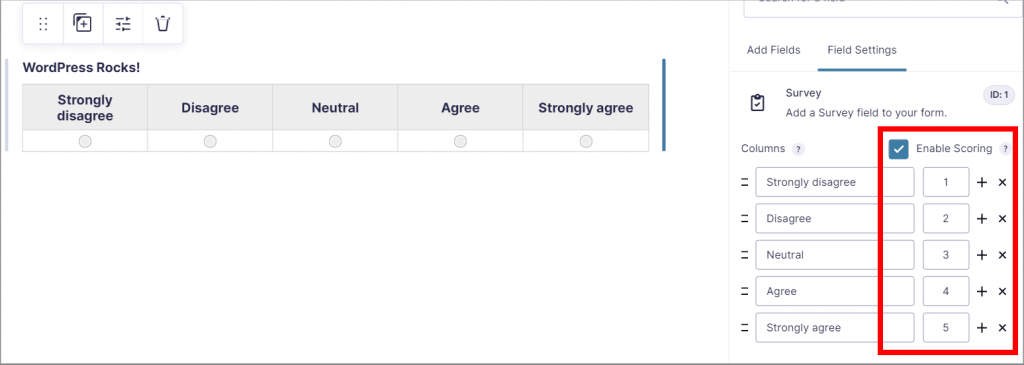
If you want Gravity Forms to calculate a final score for all questions in the survey, give each response a score. (See the highlighted section in the image above). Then use a Number field to perform the calculation. Learn more about scoring.
Step 3: Set Up Confirmations and Notifications
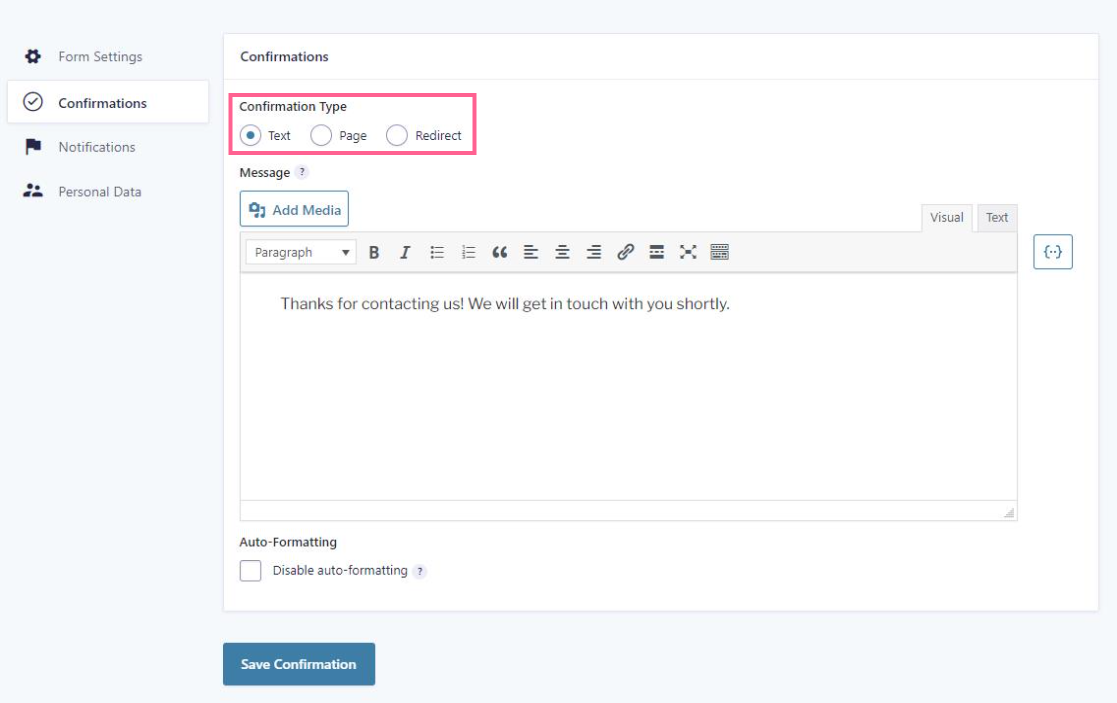
A confirmation is a message that the submitter sees to confirm their submission. Gravity Form’s default confirmation (“Thanks for contacting us! We will get in touch with you shortly.”) is probably fine, but you might want to customize it to something like “Thanks for submitting our survey! Your opinions are appreciated.”
Visit Settings > Confirmations and click Edit under the default confirmation. There are three options:
- Text: Edit the text in the text area.
- Page: Select a page on your WordPress site
- Redirect: Add the URL of any page.
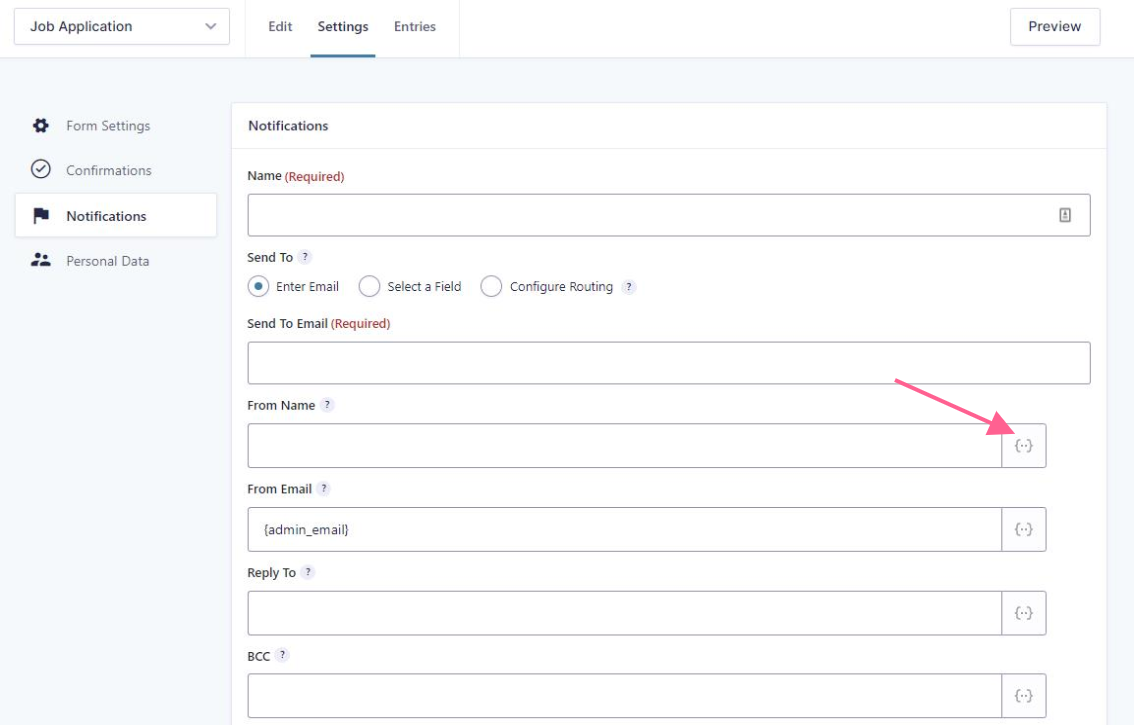
Next, customize your notifications. A notification is an emailed message to let you or anyone else know that someone submitted the customer satisfaction survey. You may want to notify someone on the marketing team or a customer success manager.
To set up a notification email, visit Settings > Notifications. Click Add New to create a new notification. Then complete each field. You can use merge tags (the button to the right of the field) to add form data to it for several fields. For example, you may want to include the “All Submitted Fields” merge tag in the message box to display all submissions.
4. Publish the Customer Satisfaction Survey
For customers to use the form, it needs to be accessible somewhere on your site. So next, you’ll need to add it to a page or post. Visit the WordPress editor for the page or post where you want the form to appear. Add the Gravity Forms block and select the customer satisfaction survey you just made.
Give this page a simple URL that you can remember. You can easily link to it in emails to your customers by doing this. If your content platform allows it, it’s also a good idea to add a widget to this page that reminds the customer of what they purchased. This reminder can help them complete the survey accurately. Once you’re happy with the page, click Publish.
How to Create the Survey Report
Now that your survey is available for customers to complete, the next step is to create the live report for you and your team. To do this, we’ll use GFChart, a WordPress chart builder plugin. GFChart lets you build a visualization for each question on your customer satisfaction survey.
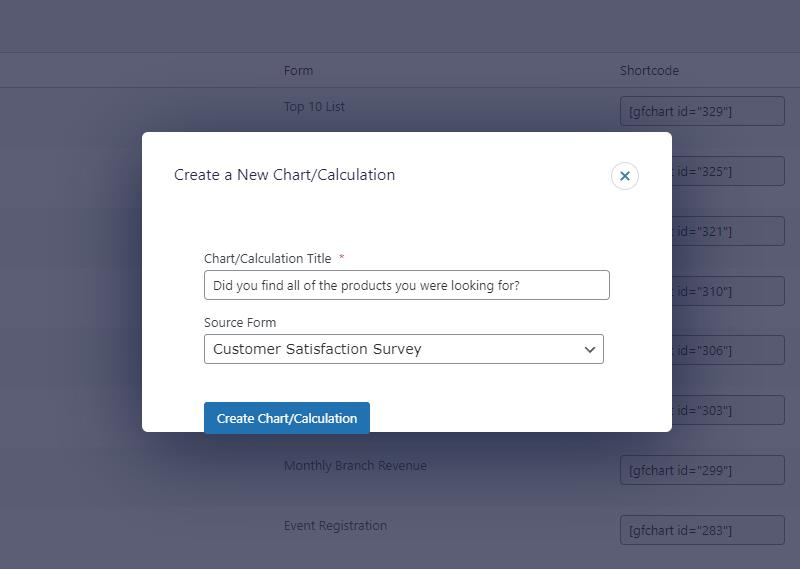
Let’s say you have this question on your survey: “Did you find all of the products you were looking for?” To make a chart for it, visit Forms > Charts/Calculations.
Click Add New and give your chart a title. Use something unique to tell it apart from other forms (ideally giving it a similar name to the question it will track). Then select the customer satisfaction survey as the form source. Click Create Chart/Calculation to get started.
The next page is the chart builder, divided into four tabs:
- Design: Choose the type of chart you’d like to create. In this case, a pie chart is most suitable. More options will appear below. Choose whichever makes the most sense. You can always change them later.
- Select Data: This is where you map your form’s fields to the chart. Since we’re charting the “Did you find all of the products you were looking for?” questions, that’s what we’ll select for Field.
- Customiser: Adjust the look of your chart. You can change the height and the width to whatever works best for your site. You can also add custom CSS code.
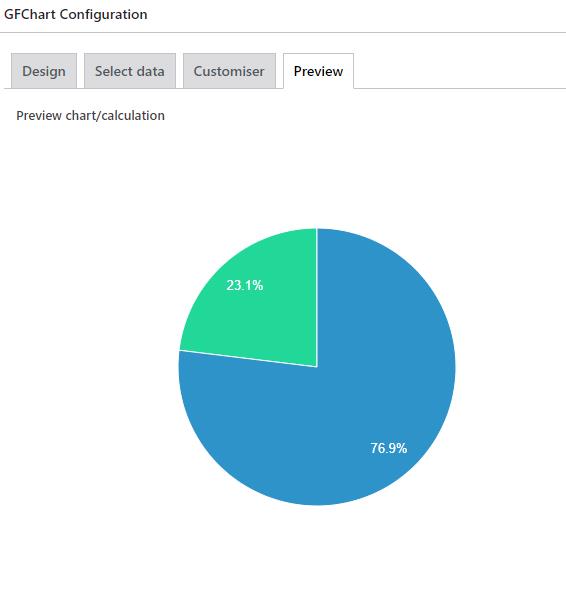
- Preview: This is where you can preview your chart before publishing it to make sure the data is displayed accurately. (Note: This will only show data if you have submissions.)
After going through those settings, the result will be something like this:
Once you’re happy with your chart, click Publish.
Your final step is to add your new chart to a page that you and your team can access. Simply visit the WordPress editor of the page or post where you want the truck to appear and use the Chart block to publish it. Now your chart is live, meaning it will update whenever the page is refreshed based on new submissions.
If there are more questions in your customer satisfaction survey that you would like to track with your live report, create a unique chart for each one of them. You can insert them all onto the same page to create a dashboard of valuable information for you and your team.
Going Forward
Customer satisfaction surveys are powerful tools to gauge your customers’ feelings about your business. Use them regularly to keep your finger on the pulse of your customer base, and use this tutorial to build a live report that keeps that information accessible at all times.