
The Best WordPress Assessment Plugin for Creating Quizzes and Personality Assessments
Are you looking for a WordPress assessment plugin for your website? An assessment plugin – sometimes called a quiz plugin – is a powerful way to check a person’s personality, achievement, score, or knowledge on a particular subject.
In this article, we will explain why GFChart is the best WordPress assessment plugin to help you build quizzes, tests, assignments, and even exams, and how to start building your own. You can create and score simple or complex assessments with ease thanks to the combined power of GFChart and Gravity Forms.
Why GFChart and Gravity Forms are the Best WordPress Assessment Plugins
Data on its own is hard to understand. Nobody gets much value from looking at rows and columns of row figures. In order to help your audience understand data, it’s best to display it with a visualization. Converting the results of your WordPress assessment into a visualization will help your readers engage with the quiz.
With Gravity Forms, you can create any type of assessment or quiz you can imagine. Building surveys, risk assessments, academic loan repayment planning, wealth management…all possible with these two powerful WordPress plugins. Assessments can be delivered in two distinct modes:
- User is logged in. They already have a relationship with the organization behind the website and are happy to enter sometimes comprehensive and detailed information. They may complete the same or similar test periodically and want to monitor progress against time.
- User is not logged in. This is often for a “teaser” assessment to create engagement with a potential customer. Upon completion there may be an option to create an account, or have the report emailed to them (and hence capture their email address).
With GFChart, you can display that data in a professional, visualized manner on any WordPress page or post. You can share with your team, stakeholders, readers, or anyone else. By adding these assets into your assessments, you can create a powerful experience for your users.
How to Create an Online Assessment with a WordPress Assessment Plugin
Let’s walk through the steps of creating your own online WordPress assessment.
Step 1: Get the required plugins
In order to create a WordPress assessment plugin, you’ll need a few tools:
Gravity Forms is the perfect plugin for producing the assessment form. This is how you’ll collect information from sumitters. In addition to traditional form building capabilities, it includes numerical calculations to power “balanced scorecard” analysis. The Gravity Forms basic license is sufficient.
GravityView specializes in displaying information captured by Gravity Forms. Unlike traditional quizzes and surveys, assessments are produced from a single form entry. GravityView has the capability to easily isolate specific form entries.
GravityView’s shortcode is perfect for conditionally displaying text dependent on survey answers. Restricting results to the currently logged in user is achieved using its advanced filtering extension which requires the “Core + Extensions” package.
Finally, you’ll need GFChart to display visualizations of the assessment answers. For instance, you could show a WordPress chart or graph based on the submitter’s result. Make sure you have GFChart’s GravityView add-on installed so the two plugins work together.
If you need help installing a WordPress plugin, check out this detailed tutorial.
Step 2: Create the assessment form
Your next step is to create the form. Once Gravity Forms is installed, click Forms > New Form on the left side of your WordPress dashboard. Give the form a name that distinguishes it from other forms. For instance, you might call it “Personality Assessment.” Then click Create Form.
Step 3: Add fields to the form
Start by adding the basic fields every form needs: name and email.
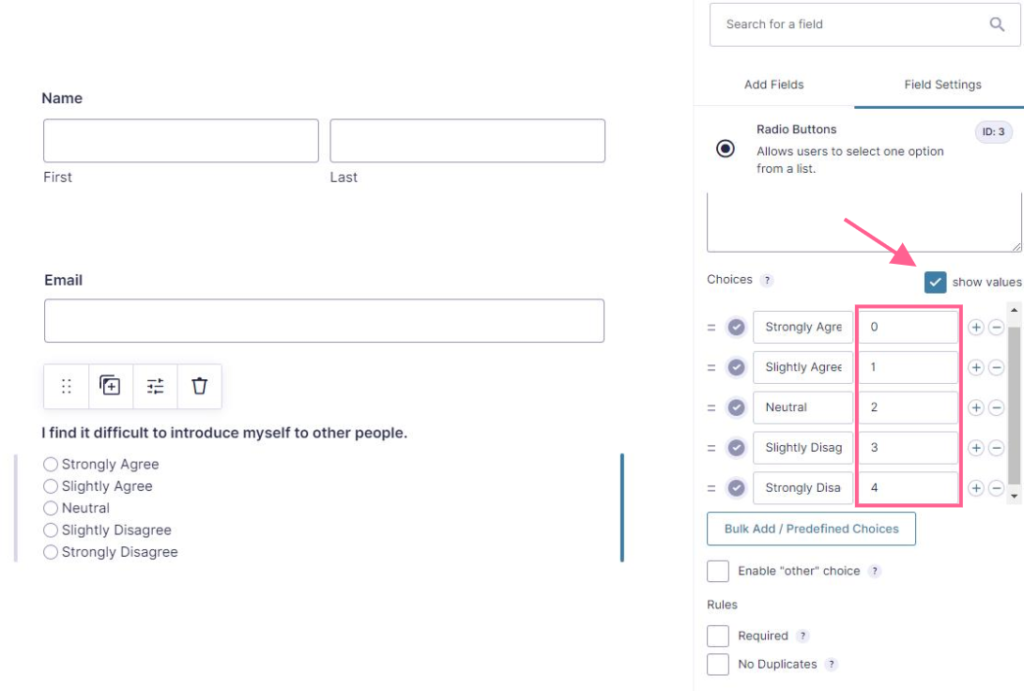
Then start adding your assessment questions using Radio Buttons. For each question in your assessment, it’s important to check the “show values” box and give each possible answer a value for scoring.
Add your remaining WordPress assessment quiz questions and save the form.
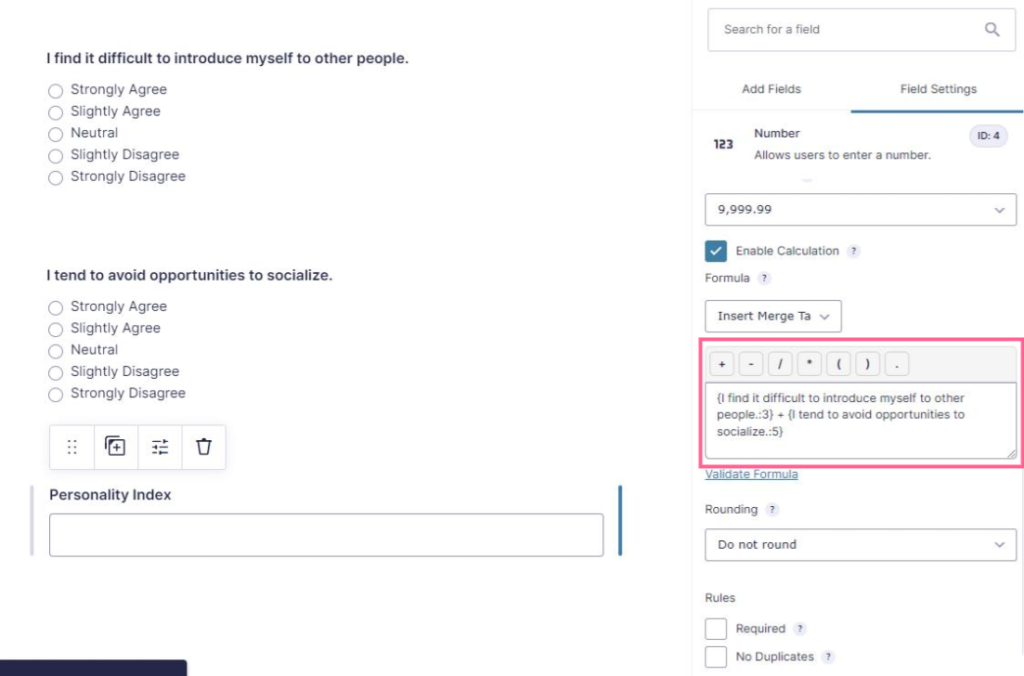
Once you have created all of your questions, your next step is to add a calculation field to total the submitter’s score. To do this, add the Number field and check the “enable calculation” box so it calculates based on values set elsewhere.
A box for math will appear. This is where you insert the formula that will calculate your assessment. Use merge tags to insert the values of each of your questions. Place a plus sign between them to complete the equation. Finally, in the advanced settings, check the box as “administrative” so users don’t see it.
For a walkthrough of this process, watch our video:
When you are happy with your form, click the Save Form button.
Step 4: Publish your form
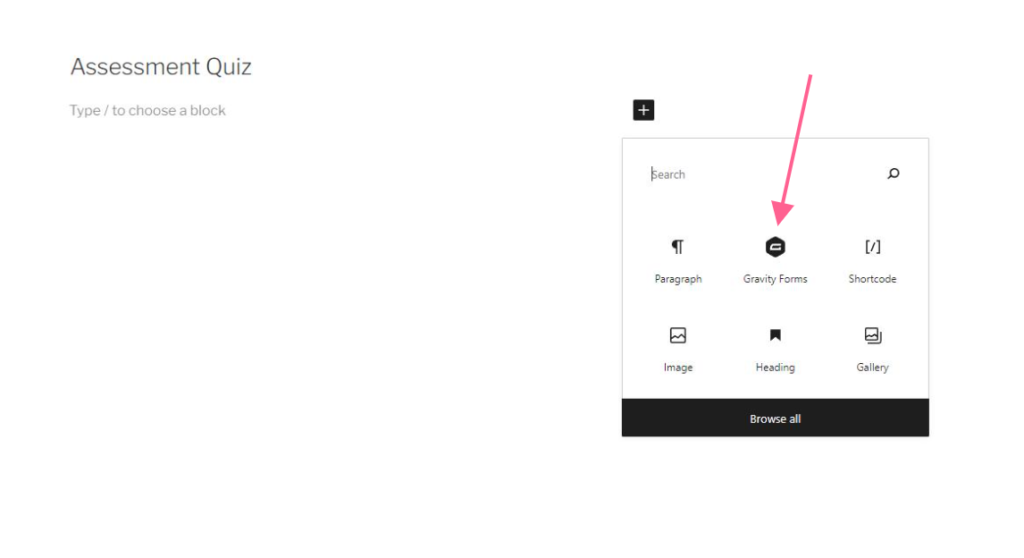
Your next step is to publish the form to a page or post where your website visitors can access it. Fortunately, embedding a Gravity Form to a page is super simple. Just use the Gravity Form Gutenberg block and select your form from the drop down menu.
Step 5: Create the assessment report
Now that the form is complete, it’s time to create the report using GravityView.
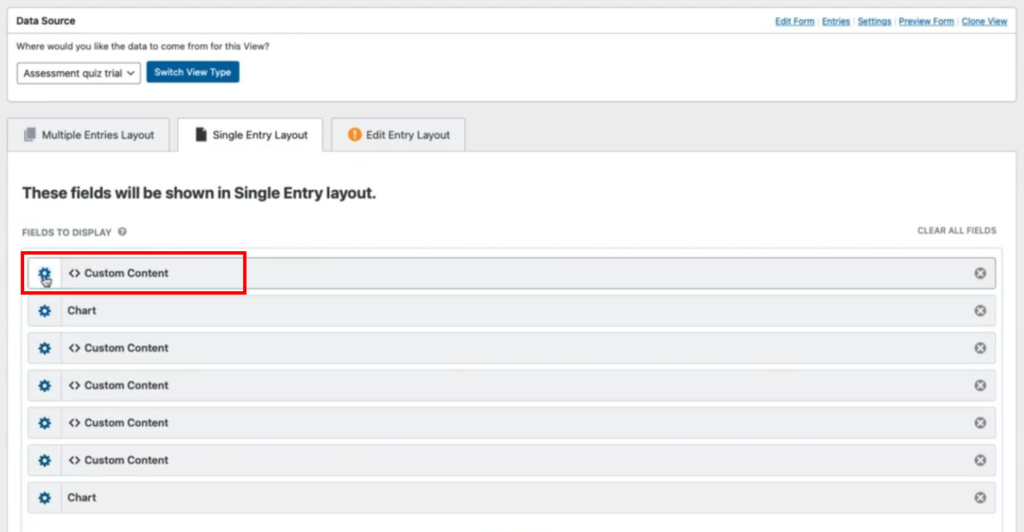
Click Views > New View on the left side of your WordPress dashboard. Give it a name that relates to the form you just created to keep them organized. Under “Data Source,” connect it to the correct form. Unde “View Type,” choose the view type that makes the most sense for your assessment (which is typically the listing view type).
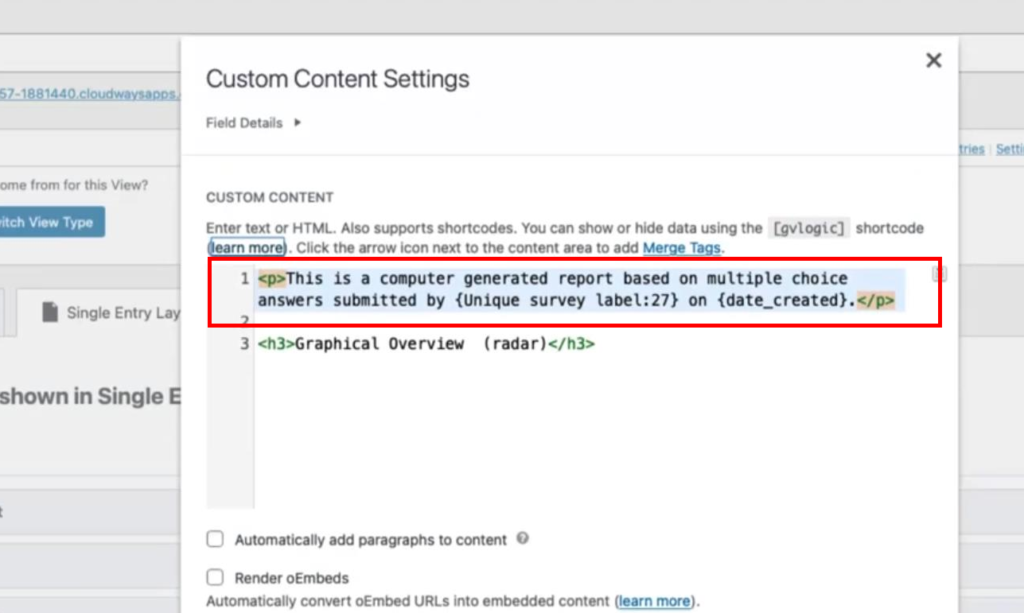
GravityView is effectively a page builder using fields. Since users can view a list of entries and click into each entry individually, you’ll need to map fields to the list and to the single entries themselves. In order to show the results of the assessment quiz for each entry, simply add the “custom content” widget to the single entries tab.
In the custom content settings, you can add merge tags that pull data from the Gravity Form. Since your form is set up to perform a calculation, the results of that calculation will appear here.
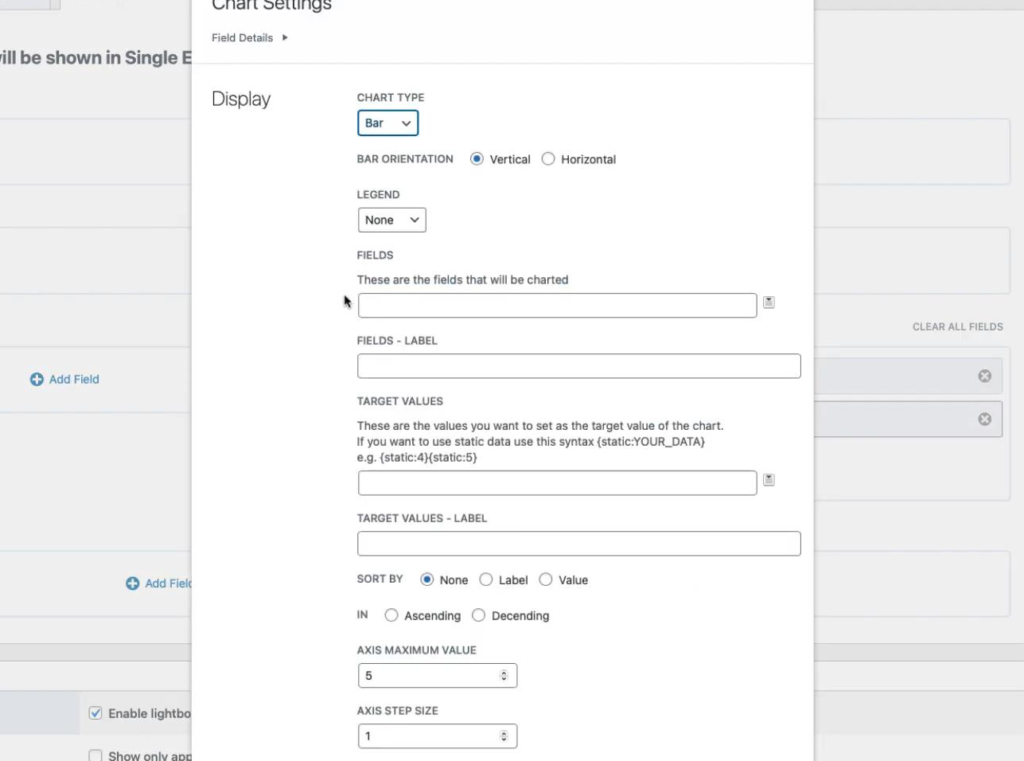
Since you have GFChart with the GravityView add-on installed, you can also add charts to your single entries. Simply add a chart widget and customize the settings to produce a chart that serves your data.
We strongly recommend watching this video for a complete walkthrough of the process:
Step 6: Link the form and report
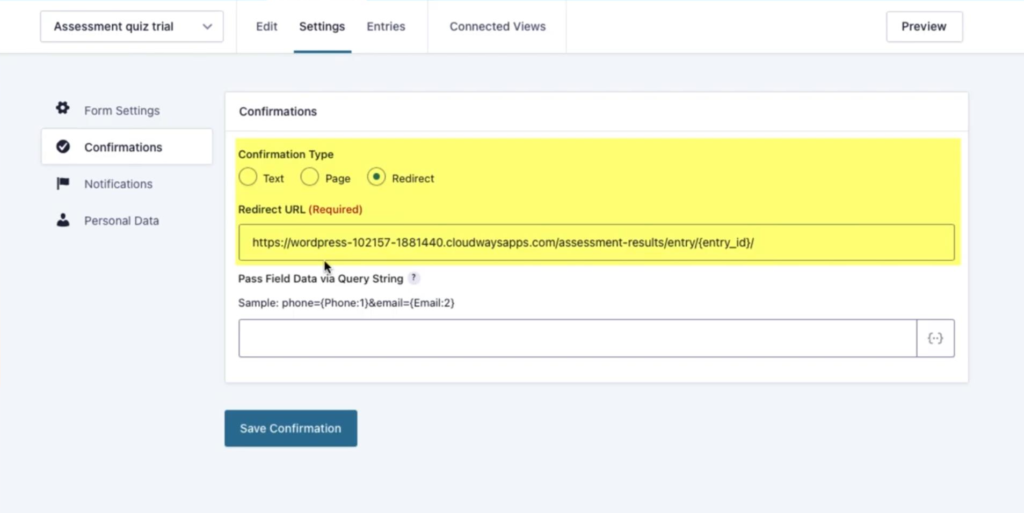
Your final step is to link the form and report together so the user has a seamless experience. This is quick and easy. First, set a redirect in the form settings using the {entry_id} merge tag so the user is directed to the GravityView upon submission.
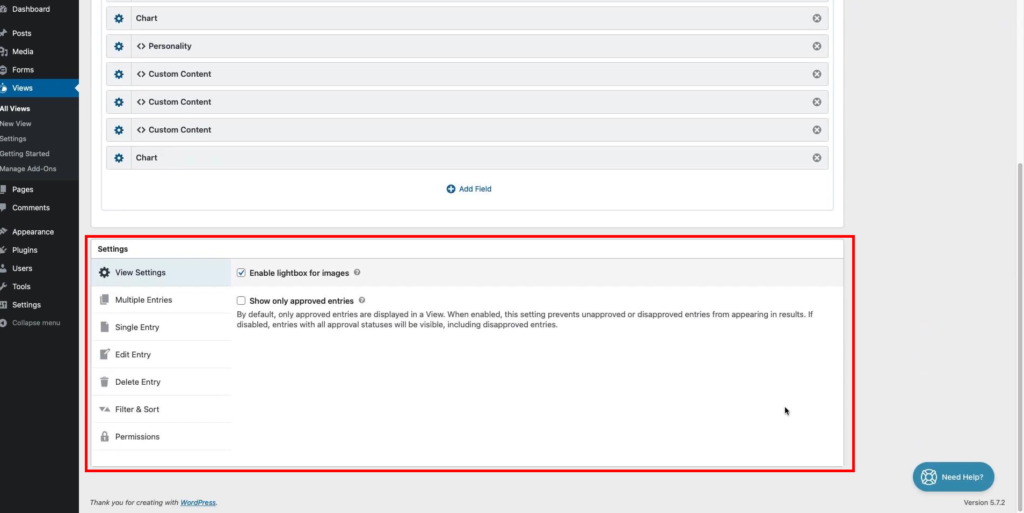
Next, return to your View and browse the settings at the bottom. Make any adjustments that are appropriate for your form. For instance, you may want to give your entries or the master list a title. You might also decide to play around with the filtering.
Here’s a quick video walkthrough to show you how: