
Trend monitoring is a crucial way to spot changes in your data and make predictions about what will happen in the future. It’s an important tool in a leader’s or business owner’s toolbox that provides you with the insight you need to make smart decisions.
GFChart’s new Trend Add-On is an easy-to-use addition to GFChart to help you monitor trends in your data. It gives you a comprehensive overview of every data point in a data set so you get a complete picture of how things are changing.
In this article, we’ll teach you how to monitor a trend using Gravity Forms and GFChart. You’ll learn how to place a trends chart on your website that updates whenever someone submits data through a form.
Trend monitoring is crucial to spot changes in your data and make predictions about what will happen in the future. Share on XCharting Time vs. Trends
Before we jump into the tutorial, let’s talk briefly about the difference between charting vs. time and trend monitoring. They seem similar, but there are some important differences.
GFChart’s Trend Add-On lets you plot data points over time. This type of chart plots every single data point that’s submitted by date. If you want to plot aggregated data over time periods, we recommend using the Charting vs. Time Add-On.
For instance, if you were tracking your weight loss progress, the Trends Add-On is most suitable. The chart will include a plot every time you record an entry. But if you wanted to plot the total number of customers who visit your store each day, use the Charting vs. Time Add-On.
How to Create a Trending Chart
Let’s go over the step-by-step process of creating a chart that tracks a trend.
Step 1: Grab the Required Plugins
Before you can monitor a trend, you’ll first need to install a couple plugins: Gravity Forms and GFChart. Both come with a small cost, but the insights you’ll gain are worth the price.
If you aren’t sure how to install and activate a WordPress plugin, WP Beginner has a great guide. (Don’t worry, it’s a quick process.)
Step 2: Create a Gravity Form
Next, you’ll need a Gravity Form and with some entries. If you’re a Gravity Forms user, you probably have some existing forms with entries already. If you’ve never created a Gravity Form before, read their full guide.
Step 3: Create the Chart/Graph
The next step is to build the chart. Click Forms > Charts/Calculations in your WordPress dashboard to reach GFChart. Click Add New at the top to get started.
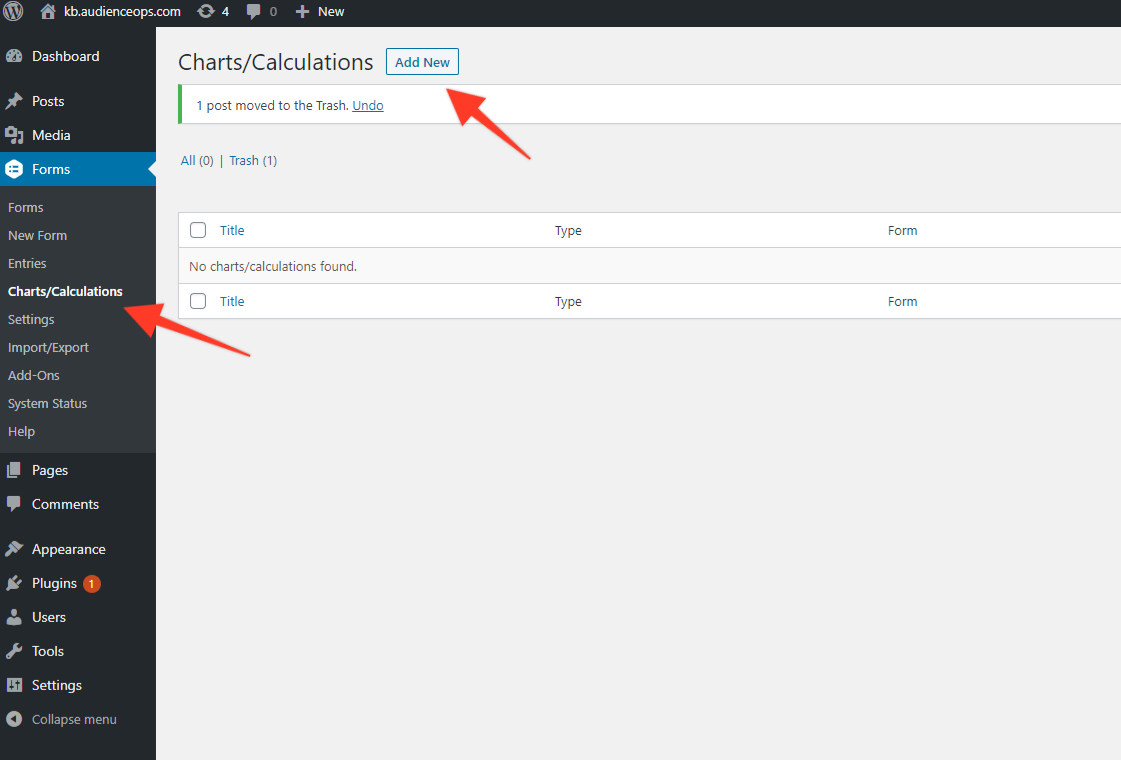
An overlay will appear that asks for two pieces of information. First, enter a name that distinguishes this chart from others. Avoid using vague names like “Trend chart” or “February chart.” For our example, we’ll go with “Revenue Trends 2020” because this chart will plot last year’s monthly revenue.
Once you’ve chosen a name, select the Gravity Form from which the chart will pull data. Click Create Chart/Calculation to jump into the chart builder.

Step 4: Choose Your Chart’s Design
GFChart offers a number of options to create a chart, but to keep things simple, we have you work through an easy, four step configuration process. Let’s go through each step.
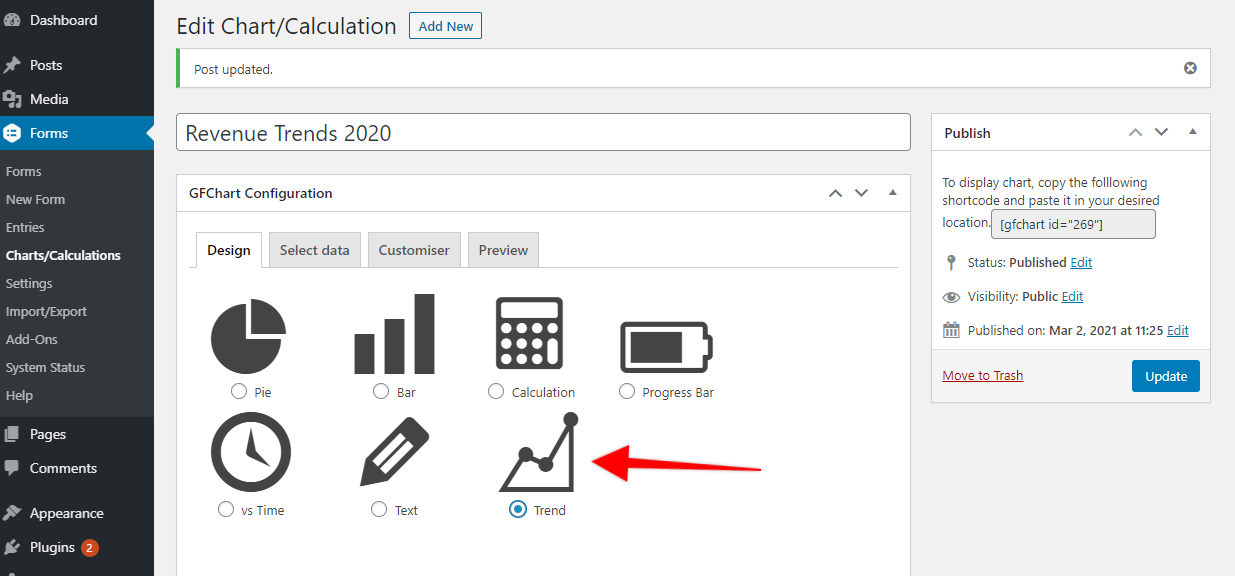
The first step asks you to choose the Design of your chart. This is where you’ll choose the format of your chart. As you can see, there are several options, but for the purpose of this tutorial, we’ll use the Trend option.
Once you choose a design option, some more options will appear below. In the case of this type of chart, you can choose the orientation (horizontal or vertical) and the position of the legend.
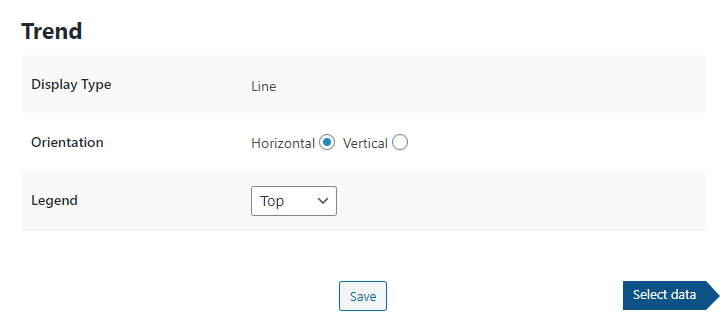
After configuring your options, click the Select Data button to move to the next step.
Step 5: Select Your Data Source
The Select Data tab is where you’ll tell GFChart where to put data points on your chart. Your X-axis will usually be your form submission date, but it could be another value if you added a date field to your form.
You’ll also have to choose a date range. In the case of this example, that’s the entire year of 2020.
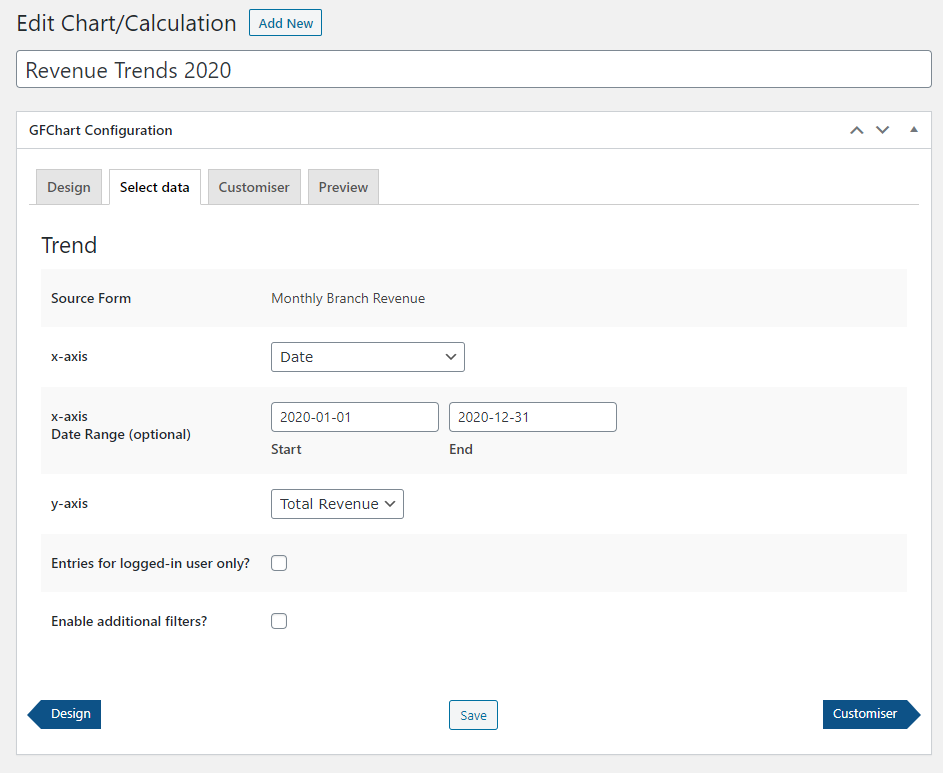
Click the Customiser button when you’re finished.
Step 6: Customize the Look of Your Chart
The Customiser tab is where you’ll configure the chart’s aesthetics. Your choices here will depend on the design of your website and where you intend to publish the form.
We recommend adjusting the width to make the chart large and easy to read on the page. If you’re comfortable using CSS, feel free to add your own stylings, but you don’t have to put anything here. (GFChart does not require you to write any code.)
Depending on your theme and placement, you may also wish to add a title to your chart. The title will appear just above the chart when you view it on a page.
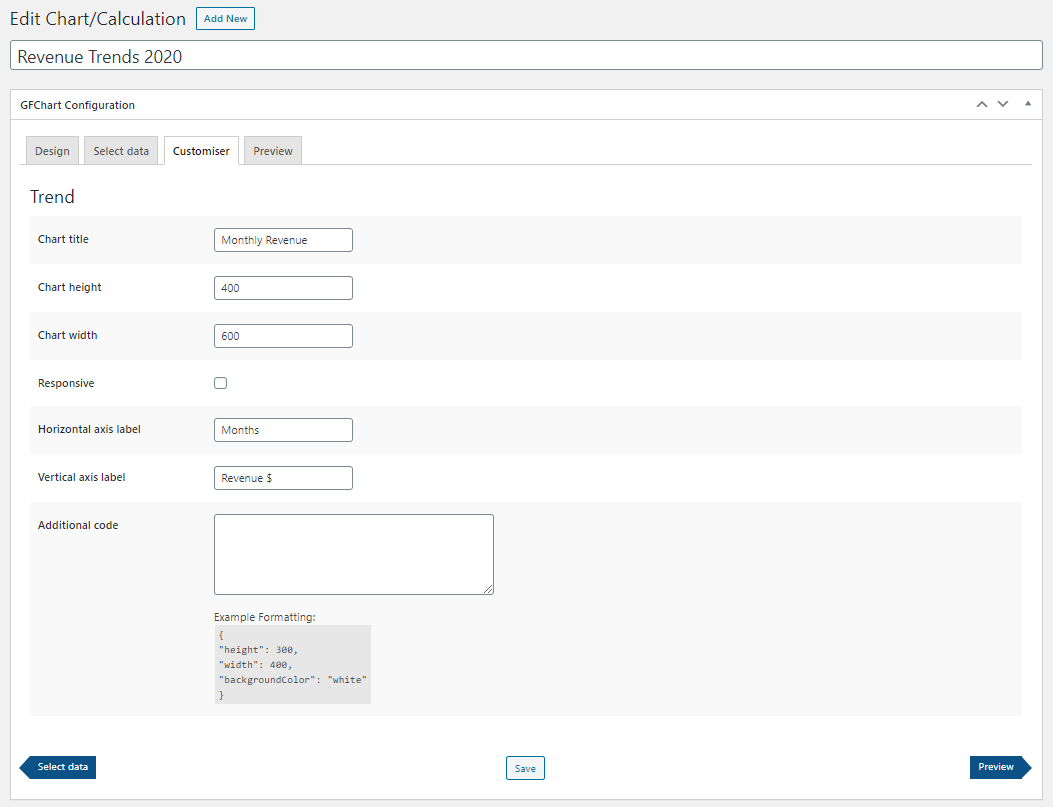
Click the Preview button when you’re finished.
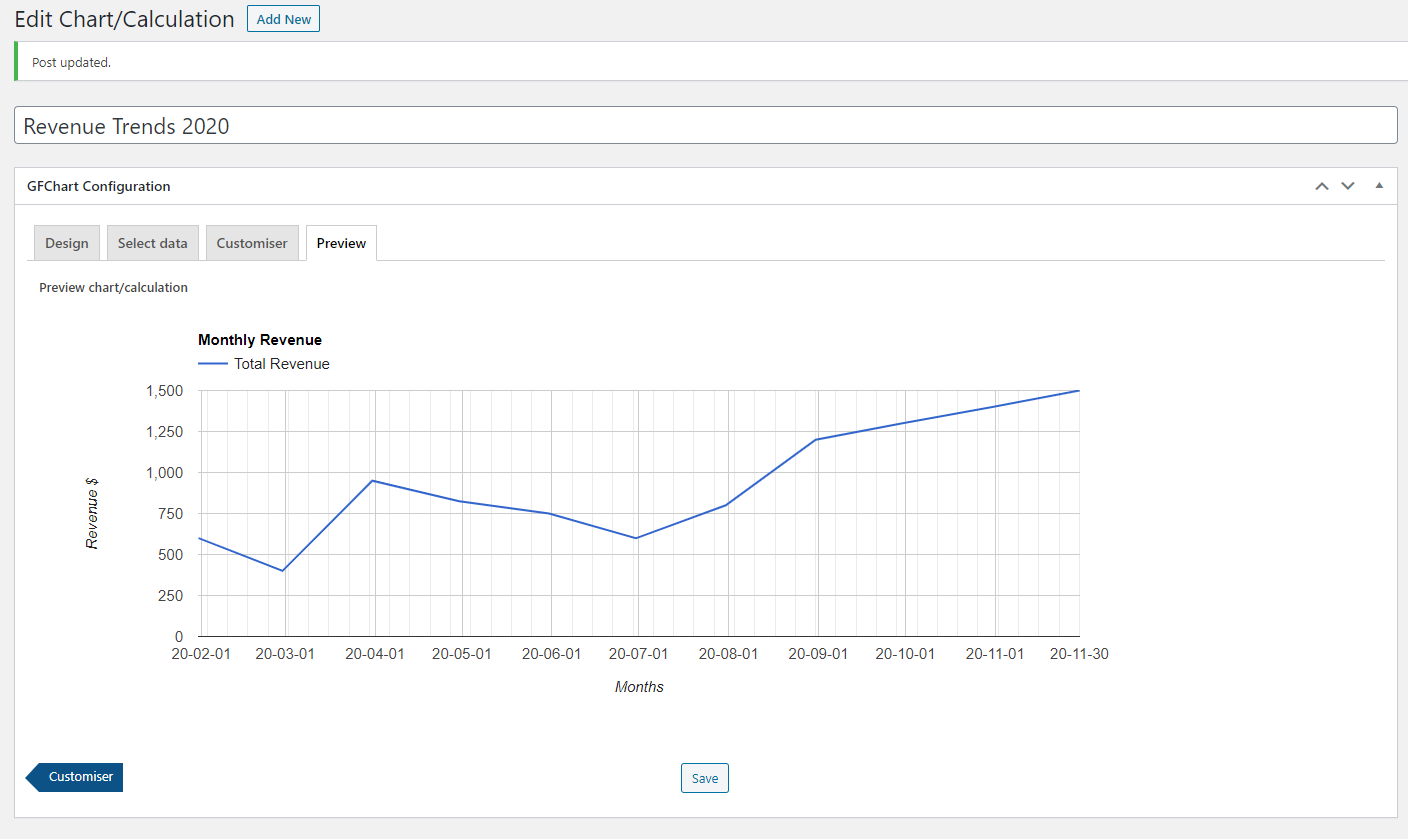
Step 7: Preview Your Chart
As you probably guessed, the Preview tab is where you have an opportunity to view your chart before you publish it to a page. Make sure the data and design elements display correctly here.
If you aren’t happy with any of the chart’s configurations, you can always navigate back to other tabs and make edits. Once you’re happy with the chart, click Update.
Step 8: Publish the Chart to a Post or Page
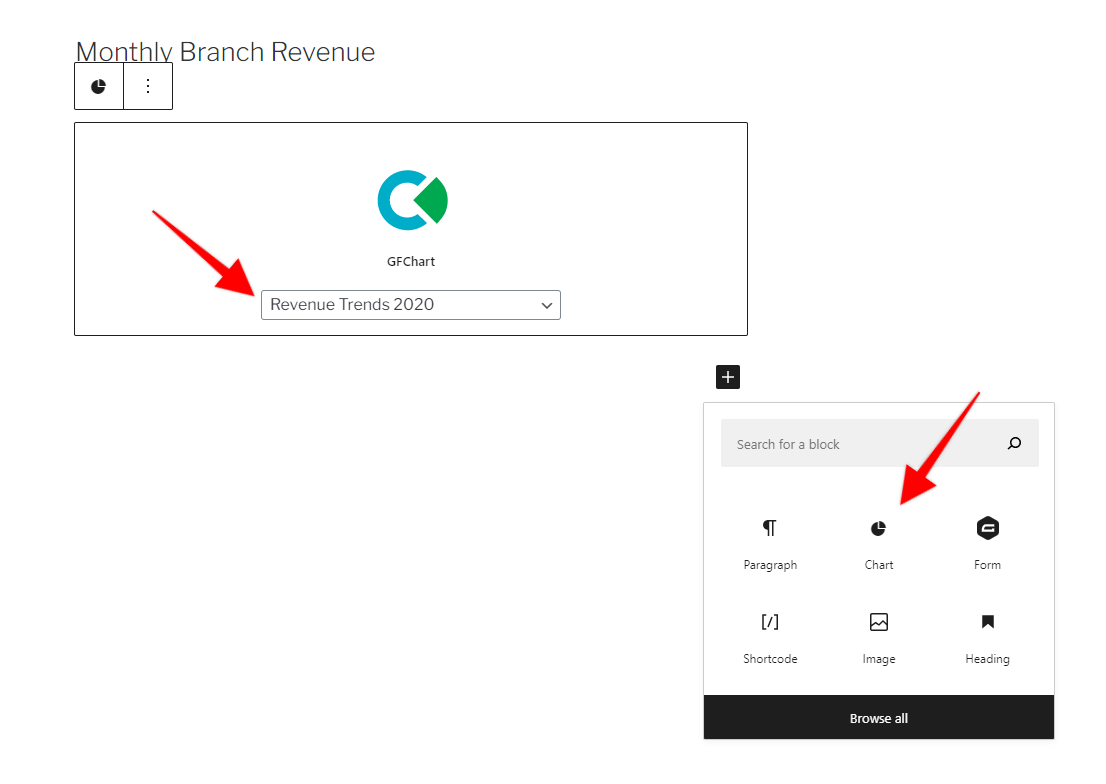
In order to make your chart accessible on the front end of your site, your next step is to add it to a page or post. Fortunately, this is super simple. You have two options.
The easiest method is to use the GFChart Gutenberg block. Click the plus icon in the content area of the editor and choose the Chart block. When the block appears, select the chart you just created from the drop-down menu.
The second method is to embed the chart using a shortcode. A shortcode is a little snippet of code you can paste anywhere on your site. Instead of displaying the code, your site will display whatever the code references (in this case, a chart).
You can find your chart’s shortcode from the right side of the chart builder. Select it and copy it to your clipboard.
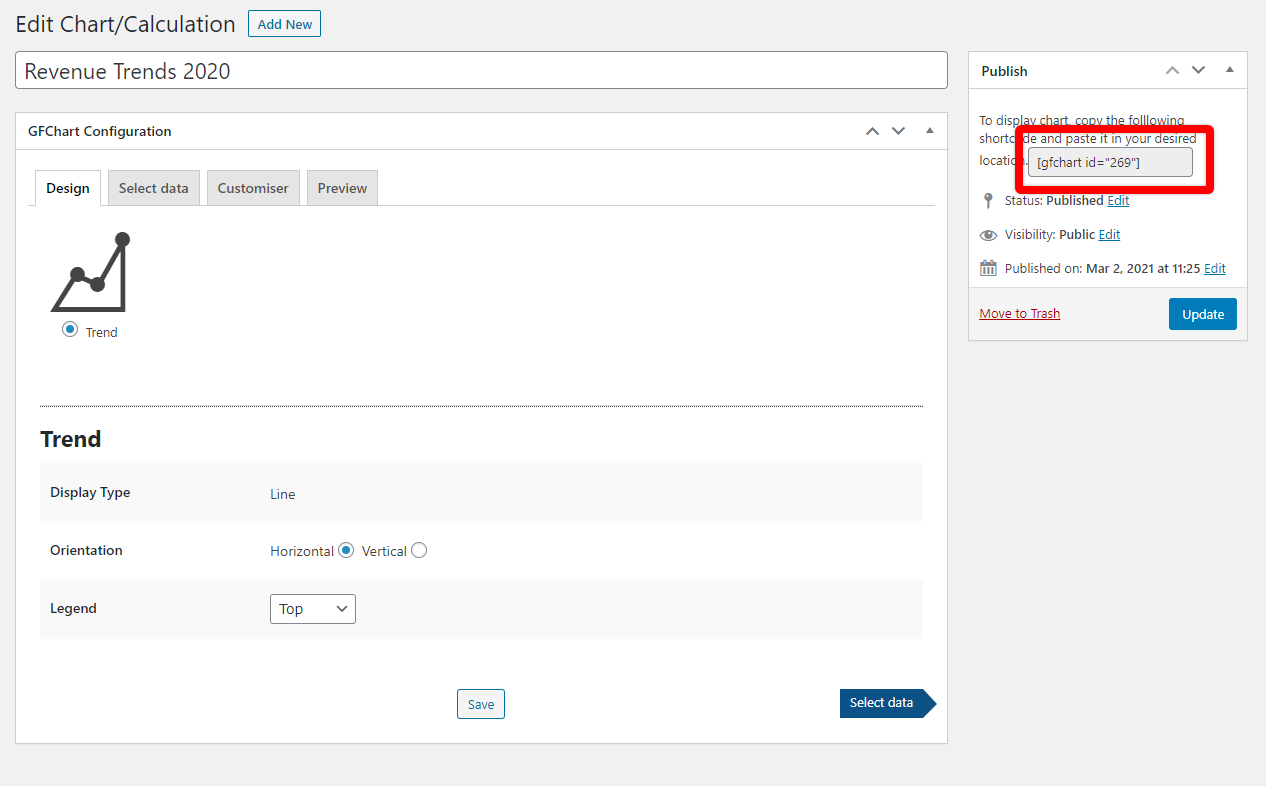
Next, paste the shortcode into any WordPress editable section. You can add your chart to posts, pages, sidebars, footers, and any other widget.

Step 9: Preview Your Page
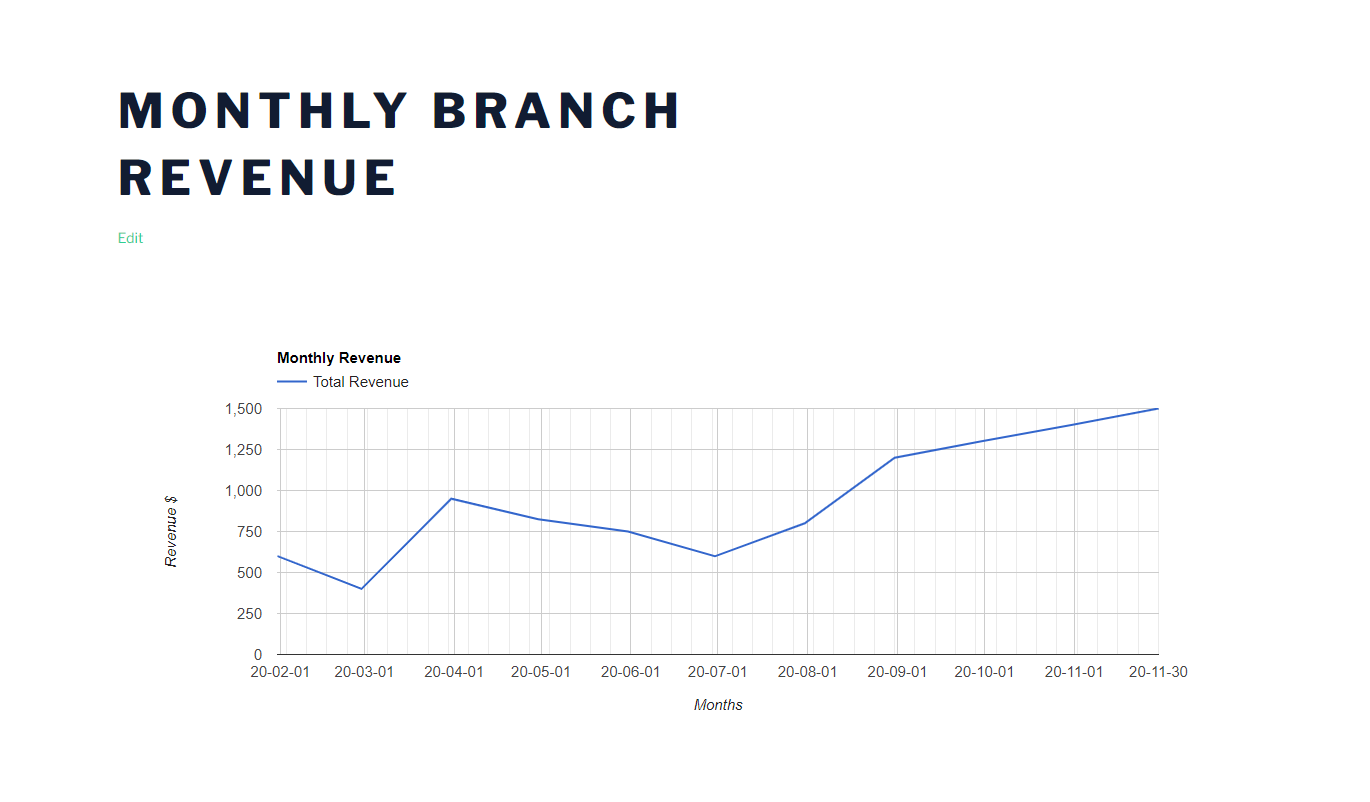
Final step! It’s now time to view your chart on the front end of your site. Even though you previewed the chart in the chart builder, it’s important to see the final result to ensure it fits into your page’s design and can be understood by your readers.
Here’s what our example chart looks like on a basic page. As you can see, it’s a bit wide, so we may decide to go back to the chart builder and make it a bit more narrow.
Going Forward
Once your GFChart is set up, it will update every time someone submits data through the linked form. This means the chart will always be up-to-date, giving you the most comprehensive view of your trend.
If you rely on other people to submit data to your chart, make sure to provide them with a link to the correct page where they can access the associated Gravity Form. In most cases, it’s smart to put the form and the chart on the same page to eliminate confusion.
If you have any questions using our Trends Add-On, please don’t hesitate to reach out.