
Creating online registration forms can offer a variety of benefits for organizations hoping to streamline their business workflows. Whether improving the user experience on your website, automating data collection of participant information, or creating a more secure environment when digitizing and collecting personal details, online registration forms offer a flexible solution for all of the above.
Powerful plugins like Gravity Forms simplify the process of creating event registration and booking forms on WordPress sites, allowing companies to quickly and easily create functional registration forms that allow for easy booking of participant information.
Combining the flexibility of online event registration forms with live reporting capabilities, GFChart allows organizations to collect relevant registration details of participants and display real-time reporting of the data being managed. This gives event managers transparent details on how many participants will be attending, giving participants an idea of how popular a particular event might be.
How to Create an Event Registration Form With Live Reporting
Gravity Forms and GFChart make it easy to simplify your event registration process while getting more engagement from participants through live reporting charts and reports. Click To TweetBelow we’ll cover a basic tutorial on how you can get started building a functional event registration form on your WordPress site.
1. Get the Necessary Plugins
Before you can build a registration form with live reporting through GFChart, you’ll need to ensure you have the right plugins installed on your WordPress site.
Make sure you are operating on WordPress version 4.3 or higher and download and install the Gravity Forms and GFChart Plugins.
2. Create New Gravity Form
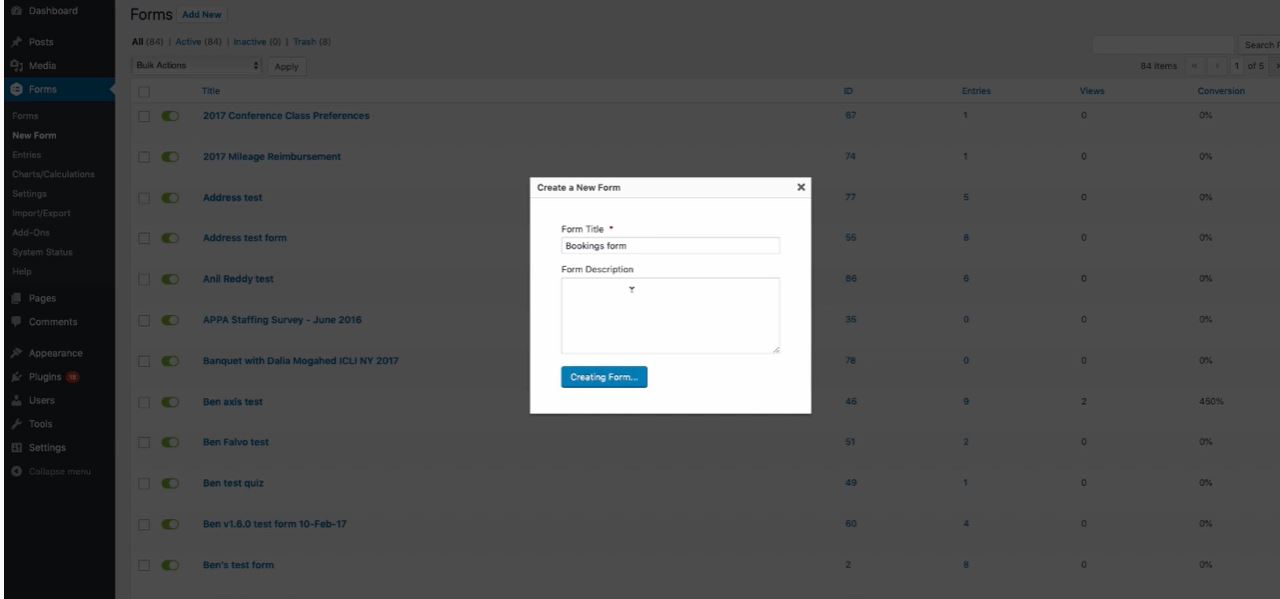
Once you’ve installed both necessary plugins, you’re ready to create a new Gravity Form. To do so, log into your WordPress platform, navigate to the left side panel, highlight “Forms,” and then select “New Form.”
Decide on a name for your form and then click “Create Form.”
3. Complete All Standard and Advanced Fields
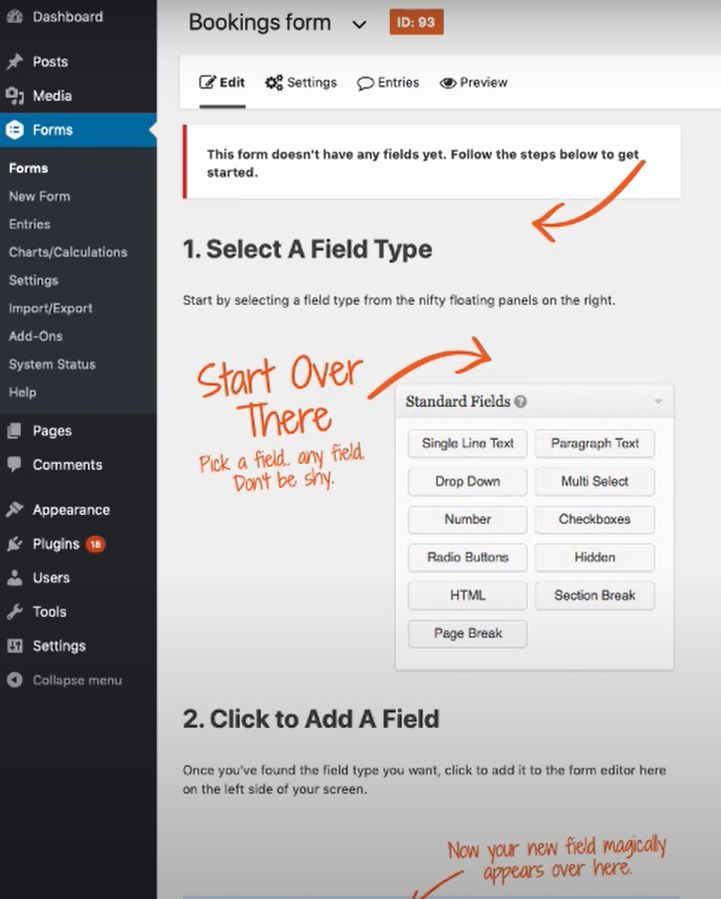
In the next section of the event registration form build, you’ll be greeted with step-by-step instructions you follow to start creating your form. This all begins by filling in standard and advanced field types that help you construct and format how your registration form will look.
Your Standard Fields will include options like:
- Single Line Text
- Drop Down Tools
- Multi Select Options
- Numbers
- Checkboxes
Advanced Fields will give you data pull options such as:
- Name
- Date
- Time
- Address
- Phone
Both of these field options will give you the majority of features you’ll need to construct the build of your registration form.
4. Setup Relevant Pricing Fields
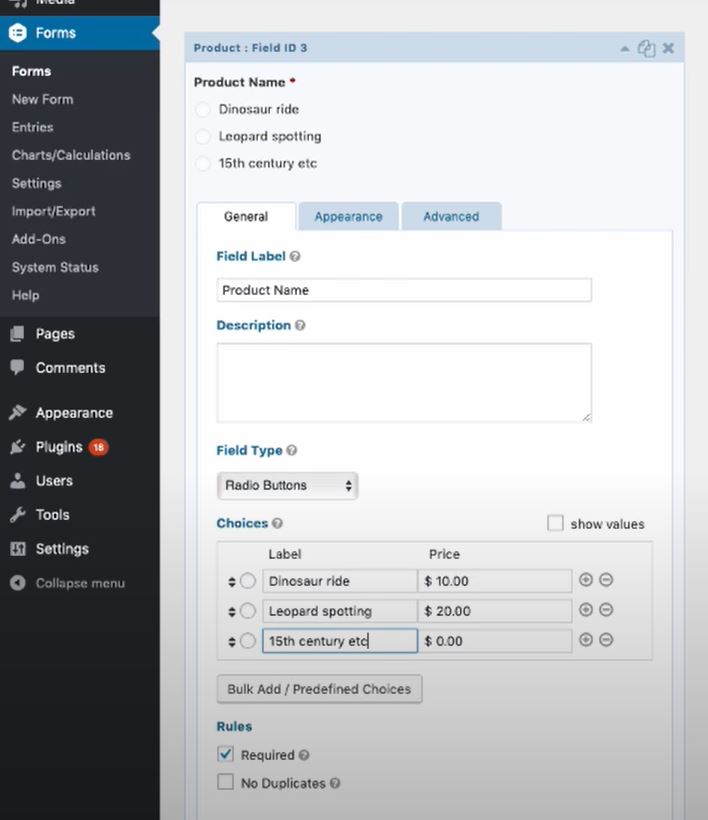
Once you’ve established the main construct of your form, you’ll want to establish any relevant pricing fields where applicable. This is where you’ll be able to enable specific options associated with product or service pricing as well as the field types and labels associated.
Select the dropdown list “Field Type” to sort through the various display options for your pricing. Then, change any display labels, pricing points, or the number of choices available and click “Update” when finished.
5. Preview and Test Event Registration Form
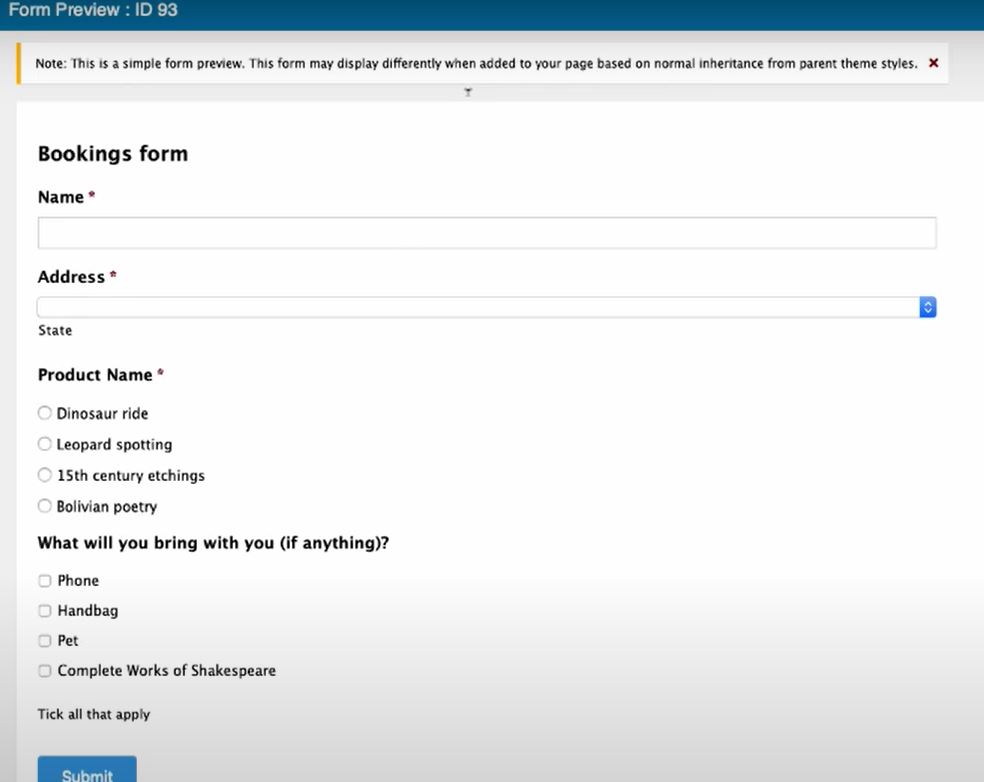
After you’ve updated your form fields and updated (saved) your form settings, click the “Preview” button at the top of your plugin page. Here you’ll be able to test the functionality of your form and make sure it meets your formatting expectations.
If you want to make any edits, simply close the preview window, make any applicable changes to your form fields, and then preview/test the form again until you’re satisfied with the layout.
Once the form is created, you can add it to its own webpage or embed its coding into another area of your website.
Embedding Live Reporting Capabilities
Once you’ve built an event registration form, you can now use GFChart to show real-time reporting of your registration details that your audience can then view before or after they submit their information. Below is a brief tutorial on how you can achieve this.
6. Create New Chart Calculation
Once you’ve built your registration form, navigate to the left-side panel, highlight “Forms,” and then select “Charts/Calculations.” After you’ve guided to this section, you’ll be given a list of all of your created forms. Choose the registration form you just completed.
7. Choose Your Chart Design
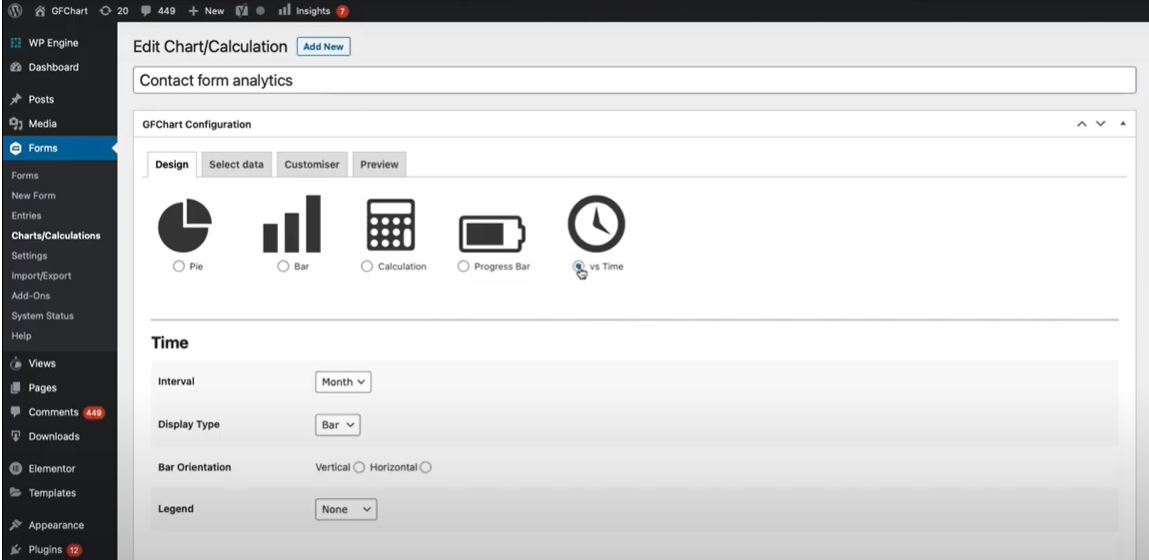
In the next screen, you have the ability to edit the Chart/Calculation settings.
In this module, you can choose the chart type you’d like to format your reports in by selecting the appropriate icon in the “Design” tab. Depending on the type of chart you select, you’ll have other formatting options become available below it.
Once you select or deselect your preferences, click “Select data” at the bottom right of your screen, and you’ll navigate to the next set of options.
8. Select and Customize Your Data
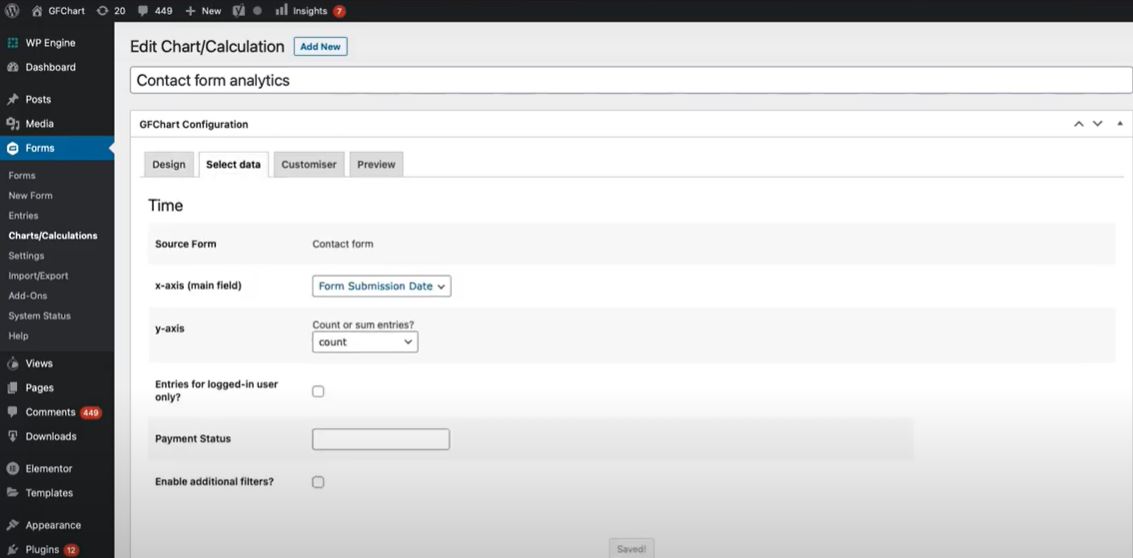
After you’ve selected the chart type you’ll be using, you then will be able to structure the type of data you’ll be using to build the chart.
In the “In the “x-axis (main field)” dropdown list, choose the relevant data you’ll want to use for your chart. Use the “y-axis” dropdown if you have any special data calculation needs when averaging or adding totals.
Once finished, click “Customiser” on the bottom right of the screen.
9. Customize Your Chart, Preview, and Embed\

The “Customiser “tab is where you’ll be able to make some last-minute customizations to the structure of the chart itself. If you want to change features like the chart’s height and width as well as its horizontal and vertical axis labels, this will be the place you can achieve that.
Once you’ve customized the chart to your liking, click the “Preview” button on the bottom right of the screen.
The “Preview” tab is where you can view the registration form chart you’ve just created. Similar to the creation of the form itself, once in the preview tab, you can cycle back and forth between the different data configuration tabs and make any final adjustments to your chart that are needed.
You can create as many charts or reports using your registration data as you want and embed them on the same page as your registration form. When participants enter their information, they’ll be able to see real-time changes to each of the charts created.
Final Thoughts
Online registration forms with real-time reporting are a great way to improve your user experience while also giving insight to participants and event managers. Gravity Forms and GFChart simplifies the creation of these forms and makes it easy to create data visualization elements that bring your team and customers real value.
For more information on how to create online event registration forms with real-time reporting, click here.